
Courses List page
This page shows the list of available courses. From this page following are the main actions that can be done -
- Create a new course
- Edit/delete/publish/unpublish an existing course
- Mark a course as Featured
- View Enrolled users in a course
- Add a lesson(s) to a course
- Enrol User(s) to a course
- View Reports for a particular course

Create a new Course
To create a new course, steps given below are to be followed -
- Login to admin area
- Go to Components > Shika
- On the left side menus click on “Courses” [Assuming you have the desired category already created. If not, create a category first]
- Click on “New” [] button from the toolbar
- To create a free course -
- Short Description character limit can be set from course settings in Shika Configuration.
- Long Description
- Image - This is the course image that will be shown on the Course list as well as on the course details page.
- Status - This option allows you to select the state of course while creation.
- Featured - This option allows you to make the course “Featured”.
- Certificate Term - This option allows you to add certificates based on some criteria, and those are -
- Pass Lessons - This option allows you to get a certificate on passing the lessons in a course, i.e if this is set as a certificate term then, amongst all the lessons there must be one lesson of type “SCORM”, “Quiz”, “Exercise” and “LTI” which have score associated with it.
- Complete Lessons - This option allows you to get a certificate on completion of the lessons in a course.
- Select Badges - This option allows you to add badges to the course. Which can be allocated after the completion of the course. In case this option is not displayed, check if “Easysocial” is installed on the site and selected as a “Social Integration” in Shika configuration.
- Tags
- This option is visible only if the “Enable tags for courses” configuration is enabled from the course settings in Shika Configuration.
- Also, “Tags” should be created in “Components > Tags”, which will then appear for selection in courses.
- Mandatory fields for creating a course are - “Title”, “Category”, “Short Description”, ”Start Date” and “Access Level”.
- Courses can be created by populating the mandatory fields and clicking on “Save and Close” [].
- Other than mandatory fields, course creation form allows the following information -
- Create a Paid Course
- In case the “Course Pricing” tab is not visible, visit the “Payment Settings” section in Shika Configuration and there will be one option “Allow to create paid courses” - set this option as “Yes”. Once this is done, “Course Pricing” tab will appear while creating / editing courses.
- All the steps mentioned above will be the same to create a paid course apart from the creating the subscriptions. Which can be done from the “Course Pricing” tab.
- In the “Course Pricing” section, you’ll be able to choose whether the course is Free / Paid. If you choose “Paid”, then the subscription options will appear and you’ll be able to create subscription(s) for the course.
- While creating a course, there are some options available in “Integration” tab like -
NOTE: In case the “Integration” tab is not visible, then go to “Extensions > Plugins” and look for the “TJIntegration” plugin and enable it. Once this is done, “Integration” tab will appear while creating / editing courses.
- Select / Auto create EasySocial Group on after course creation
- If option is selected as “Select Group”, then the course which you’re creating / editing will get added to the selected Group(s) in the option given below for selection of the available Easysocial groups.
- If option is selected as “Auto Create Group”, then the course which you’re creating / editing, with the same name Easysocial group will be created under the selected category in the option given below to select the Easysocial group categories.
- Course Prerequisites
- This option, you can select already created courses as Prerequisites for the course which you’re newly creating or editing. Once the courses are added as prerequisites, then users won’t be able to enrol and access the course contents unless the prerequisites are fulfilled. The prerequisites will get displayed on the Course details view under tab “Course Prerequisites”.
- EasySocial Points for the course
- This option is for point allocation to the users who are on course completion. The Easysocial points mentioned here will be allocated to the users who complete the course.
- One more option is available which allows admins to set layouts for the particular course(s). This option is available under “Options” tab while creating / editing the course. In the “Options” tab, there is an option to select “Layouts” [these are the same layout which we have seen in Shika configurations, and if these are set there they will apply for all courses] for the specific courses. Layouts available are -
- Compact
- Extended
- Legacy
Edit / Trash / Publish / Unpublish an existing course
On Already created courses following actions can be performed -
- Edit - To make changes to the existing courses, you can use the edit option and make the necessary changes. Once you’re done click on “Save and Close” []. To edit any course, you can select a course from the course list page and click on the “Edit” button available on”Toolbar”.
- Trash - Trash options are available to move the course(s) to Trash. Please note that “Trash” doesn’t delete the course from the system. It just changes the status of the courses to “Trashed”. In case you need to permanently delete the course from the system, you can follow the steps given below -
- Click on “Search Tools” on courses list page
- Click on the “Select Status” filter and choose “Trashed” from the drop down.
- Now, you'll be able to see all the Trashed courses.
- You may select the ones which you need to delete permanently, and click on the “Empty Trash” button from “Toolbar”.
- Publish - In case you need to “Publish” a course which is in “Unpublished” state. You can just select the course(s) and click on the “Publish” button on the toolbar. In case you need to filter the all published courses from the system, you can follow the steps given below -
- Click on “Search Tools” on courses list page
- Click on the “Select Status” filter and choose “Published” from the drop down.
- Now, you'll be able to see all the Published courses.
- Upublish - In case you need to “Unpublish” a course which is in “Published” state. You can just select the course(s) and click on the “Unpublish” button on the toolbar. In case you need to filter the all unpublished courses from the system, you can follow the steps given below -
- Click on “Search Tools” on courses list page
- Click on the “Select Status” filter and choose “Unpublished” from the drop down.
- Now, you'll be able to see all the Published courses.
Mark Course as Featured
To make a course as “Featured” there are two ways -
- While creating a course, you can make it “Featured” using the option available in course create / edit form.
- From course list view - From course list view, any course can be marked as featured. To make a course featured from course list view here are steps -
- On course list view, you’ll see a “*” icon available for every course. To mark a course as Featured you can just click on “*” and you’re done.
View Enrolled Users in a Course
To view the users who are enrolled in a particular course, you can click on the count under “Enrolled users”.
Add Lesson(s) to a course / Manage Training Material
To add a lesson in a course, on the course list view for a particular course on the extreme left you’ll see three buttons. When you hover the first - you’ll see a tooltip “Manage Training Material”. This is the option which will take you to the page where you’ll be able to create lessons. Now, let's see how to create lessons. Click on the “Manage Training Material” button.
The page will appear where you’ll see few options -
- Add Module Button - This option allows you to create a new Module. Creating modules allows the course structure to be easy and hierarchical. While creating modules, apart from Module title you can also add Module Description, and Module image.

[NOTE: Currently, the module description and image are not being displayed on user side and it may come up in future Shika versions]
- Create Lesson Button - This button will allow you to create lessons. While you click on “Create Lesson” button, a pop-up will open up which will display all the lesson types which are published*.
* -The lesson types are plugins which can be published / unpublished based on the requirement. If any lesson type from the below list is not visible, you can visit “Extensions > Plugins” and search for the missing lesson type plugin and publish it.
Lesson type / formats
SCORM
- SCORM is a Sharable Content Object Reference Model is a collection of standards and specifications for web-based electronic educational technology. Once the SCORM is selected as lesson, a lesson form will open up and it will have three tabs -
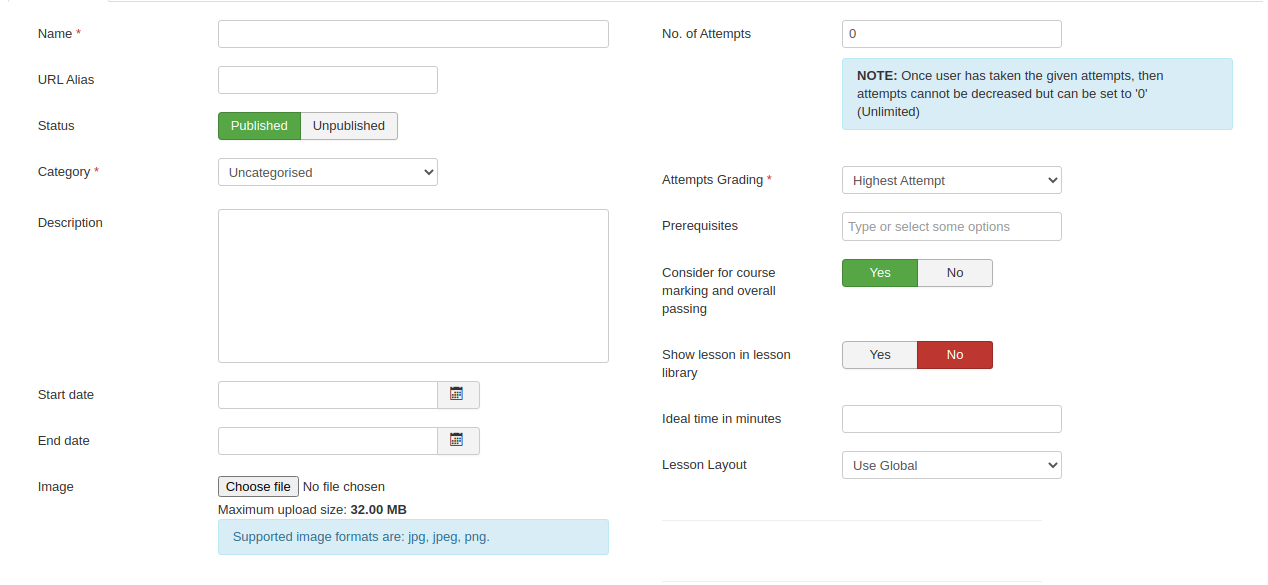
- Basic Details - This tab will contain all the basic information about the lessons
NOTE: For lesson type - Quiz, Exercise and Feedback there will be some additional field apart from the one mentioned below -
- Name - Name of the lesson. This will be visible to the user on the user side on course details view.
- URL Alias - This the unique parameter fo the lesson
- Category - Here you can choose the category for the lesson
- Description - This is the lesson description.
- Start Date - Here you can add start date for the lesson.
- End Date - Here you can add an end date for the lesson.
- Image - here you can upload image for the lesson which will be visible on the course details page (if the course layout is set as “Extended”]
- No. of Attempts - here you can restrict the attempts which user will take for this lesson.
- Attempts Grading - Here you can set the grading, on which basis you want to grade this lesson attempts.
- Prerequisites - Here you can set the prerequisites for this lesson. But for this, there must be at least one lesson created in the course to be selected as a prerequisite for this lesson.
- Consider for course marking and overall passing - This option allows you to decide whether the lesson is considered for marking and overall passing of the course.
- Show in lesson library - This option allows you to decide whether to show the lesson in the lesson library or not.
- Ideal time - This is the ideal time field, which allows admins to evaluate the actual spent time on the lesson vs the ideal time for a user. This will not impose any restrictions on the user i.e user can take more time than set ideal time for watching / attempting a lesson.
- Lesson Format - This is the section where you’ll be able to upload the actual lesson content. In case of SCORM, mostly it will be a zip file or if the file is of any other extension then that extension must be added in the Legal extension in “Content > Media” options. For SCORM, it verifies the compressed file for “imsmanifest.xml” file is present or not.

- Associate Files - This section is for uploading supporting / referenced files for the users who are attempting this lesson. These files once uploaded as Associated files will be visible to the users on the user side after launching the lesson and clicking on the “” icon from the toolbar available on the top.

HTML5
- This lesson format allows uploading only HTML5 files. This checks that the compressed files have an “index.html” file in the root position.
Video/Audio
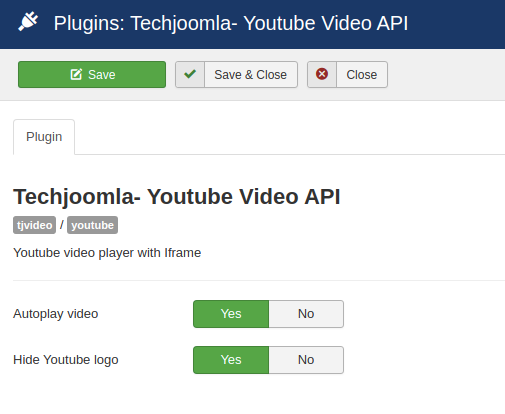
YouTube - This option allows you to use “YouTube” public video links as a lesson.
- Autoplay video - This configuration allows to decide whether video should automatically start playing while launching the lesson or not.
- Hide YouTube logo - This option allows you to control the display of YouTube logo after launching the lesson.
- Vimeo - This option allows you to use “Vimeo” links as lessons. Vimeo allows domain level privacy which if configured, the videos will be visible or accessed from the particular domain only.
- JWPlayer - This can be used to upload video / audio files as a lesson. Please note that if the file size increases it may impact the streaming performance. Recommended lesson type for larger videos is “Vimeo”.
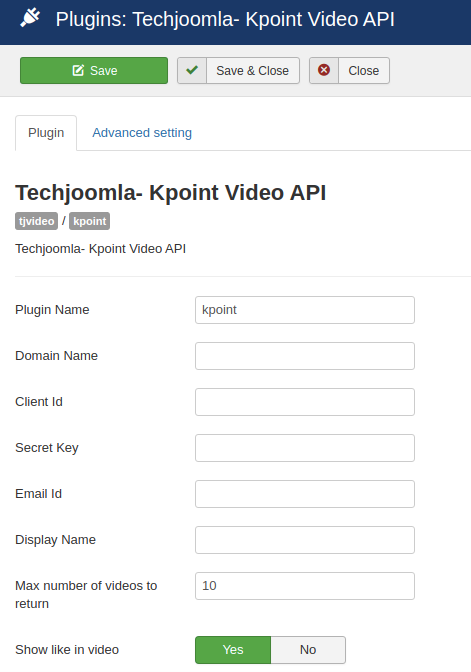
- KPoint - This is an additional integration which allows to upload videos on kpoint portal and which can be selected in the lesson as a video. Fill in the required information to make this plugin work.
Document
- PPT
- PPTX
- DOC
- DOCX
- XLS
- XLSX
- Box API - This is an integration with BoxAPI which allows uploading document type materials. The lesson material which can be uploaded using this lesson format are -
NOTE: For this there is a plugin “Techjoomla-Document Viewer Box API V2” that needs to be configured. Steps for this you can find here - https://techjoomla.com/documentation/shika/configure-new-box-api
- PDF Viewer - This option allows only uploading PDF files as lesson material.
Text and Media
Drag and Drop Builder - This option allows to create one page html structure which can be created by the available formats which can be drag and drop.
- WYSIWYG Editor - This is a simple editor which allows to show the content which is entered in the lesson using this lesson type option.
- Article as lesson - This option allows to add Article as lesson. For this Article must be created and in published state from “Content > Article”
- Link as lesson
External Tool
This option allows you to add LTI type of lessons in the course.
Event as Lesson
This option allows you to add Events as a lesson. For this to work, Events must be created and published in the Event management system (JTicketing). There are ways in which you can create an Event as lesson -
- Event Category - This option allows you to create a lesson which considers the mentioned number of events in the selected event category for passing the lesson.
- Events - This option allows you to directly select the available Event and add it as a lesson.
Quiz
This option allows you to create a quiz. You can choose this option from the pop-up which gets open up after clicking the Create Lesson button. The quiz Basic details section has some additional fields as compared to the above mentioned lesson formats. The additional fields are -
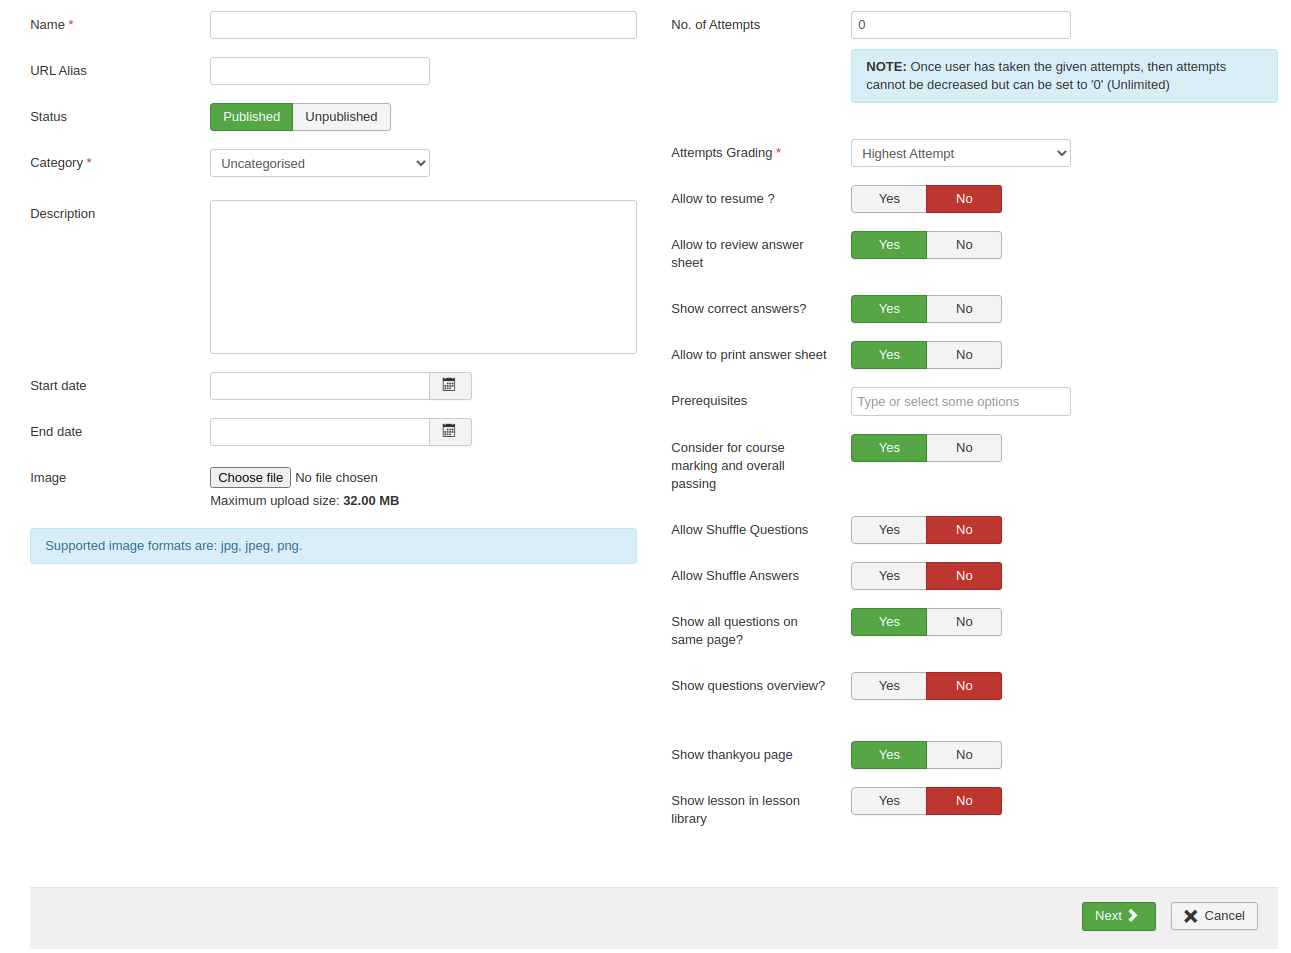
- Allow to resume - This option allows you to decide whether the incomplete attempts are allowed to resume or not.
- Allow to review answer sheet - This option allows you to decide whether to allow users to view their answer sheet after the completion of Quiz.
- Show correct answers - This option allows you to decide whether to show the correct answers to the users while viewing the answer sheet. Note that this option will only appear if “Allow to review answer sheet” option is set to “Yes”.
- Show thankyou page
- Allow to print answer sheet - This option allows you to decide whether the users can print answer sheets or not. If it's set to No then the “Print” option won’t appear on the answer sheet for the users.
- Allow shuffle questions - This option allows you to decide whether the Questions in a quiz should be shuffled or not.
- Allow shuffle answers - This option allows you to decide whether the Answers / options for a question in a quiz should be shuffled or not.
- Show all questions on same page - This option allows you to decide whether to show all the questions in a quiz on one page or not.
- Show questions overview - If “Show all questions on same page”, this option will appear. And when this option is switched ON, users will be able to see a “Question Overview” pallet on frontend while accessing the quiz.
- Questions per page - This option allows you to set the number of questions in a quiz to be displayed per page. Note that this option will only appear if the “Show all questions on same page” option is set to “No”.
- Show thankyou page - This option will decide whether to show the “Thank you” page which appears after the submission of Quiz.
Note that quiz doesn’t have the Lesson Format and Associate files tabs available. Instead, it has a “Time limit” and “Add Questions” tab. Lets see what all fields these sections contains -
- Time Limit - This section allows you to configure timing related parameters.
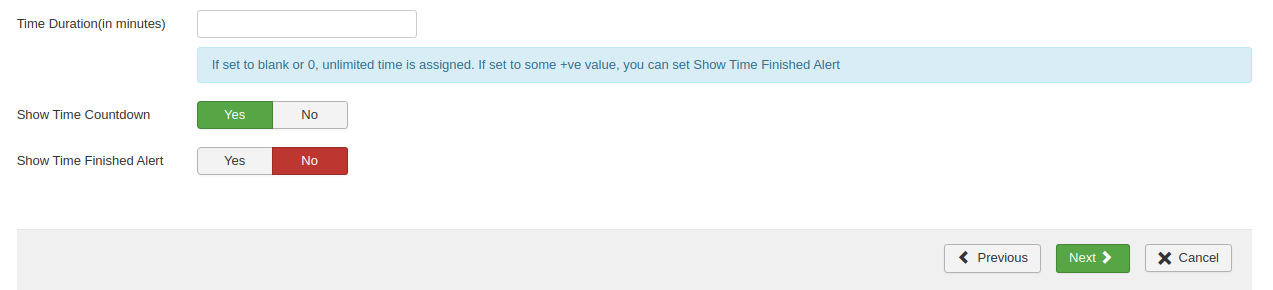
- Time Duration - This is the total duration of the Quiz. It will be shown on the top of the Quiz page after you launch and start the Quiz.
- Show Time Countdown - This option allows you to to decide whether to show the Time Countdown to the users.
- Show time finished alert - This shows the alert that the time is running out.
- Enter Minutes Before Showing 'Time Finished Alert' - This option decided when to show the time finished alert. Note that this option will only appear when the “Show time finished alert” option is set to “Yes”.
- Add Questions - This is the section where you will be able to add questions to the quiz and set the marks for the same.
- Total Marks - Total marks get automatically calculated once you add the questions.
- Passing Marks - Passing marks is a mandatory field and it should be equal to or greater than the Total marks.
- Adding Questions
- Pick Questions - This option allows you to pick the questions from the question bank which gets shown on the pop-up which appears on clicking the “Pick Questions” option.
- Auto Pick Questions - This option allows you to autopick the questions from the question bank based on the rules set, which gets shown on the pop-up which appears on clicking the “Auto Pick Questions” option. And to add the fetched questions to quiz just click on “Add questions to sections”.
- Add a question - This option allows you to create a new question from the quiz page itself and once you click on “Save and close” the question, it gets added to the quiz instantly.
- Generate a Question Pool and Generate Quizzes dynamically - This option allows you to create a question pool based on some rules. This option creates a pool of questions and dynamically fetches the set number of questions in the created rule and shows those number of questions in the quiz to the users. If you wish to use this option, you may choose the “Yes” option and go ahead by creating the rule sets.
- Create Sections - Sections can be created in a Quiz by clicking on the “Create Section” button. By using sections you may add different sets of questions in multiple sections and you will get the summary based on the performance in particular sections. This can be seen on the Quiz thankyou page. In case you’re not able to see sections wise analytics, visit “Extensions > Plugins” and look for the “Quiz Thank you page” plugin and enable it.
Exercise
- Exercise lesson format gives the ability to add questions which don’t have marks and which are required to be assessed manually by assessor(s).
- Compulsory Questions - When questions are added, a check box is available for marking the question as compulsory. Which if marked, the question becomes mandatory to be answered by the user who is making an attempt unless he won’t be able to submit the quiz.
Feedback
This option allows you to add questions which are required to take any feedback on the course contents and the data can be analysed from the reports.
- Add Existing Quiz [This will appear only, if you have at least a Quiz type of lesson created in any of the courses] - This option allows you to add the existing quiz as a lesson directly to any course.
Enrol / Assign user(s) to a course
To Enrol / Assign users to a course, on the course list view for a particular course on the extreme left you’ll see three buttons. When you hover the first - you’ll see a tool tip “Enrol/Assign Users”. Click on this option a pop-up will appear which will allow you to select the preferred action i.e Enrol / Assign. Now, let's see how to Enrol/Assign users in a particular course.
- Click on the “Enrol/Assign” button.
- If you wish to Enrol, you can directly select the user(s) from the list available on the pop-up and click on “Enrol User”.
- There is also an option “Notify user”, if this is checked the selected users will get email notification for their enrolment for the said course.
- If you wish to Assign user(s) to the course, there is an option “Assign Course with specific dates.” check in option, and calendar fields will appear for Start Date and due date. Fill the dates and click on “Assign User”.
View Reports for a course
To view reports for a course, on the course list view for a particular course on the extreme left you’ll see three buttons. When you hover the first - you’ll see a tooltip “Reports”. Click on this option a pop-up will appear which will display the course’s dashboard with details for the particular course.
Course Field Groups
Course field groups are required so that similar course fields can be grouped together. To create a course field -
- Go to Course field groups menu
- Click on “New” button
- Enter the title for the field group
- Click on save and close
Course Fields
Course fields can be created from the Course fields menu from the admin side. Once they are created, you’ll be able to see those fields in course create / edit form. These fileds can be used to associate any particular data with the course. To create a course field -
- Go to Course fields menu
- Click on “New” button
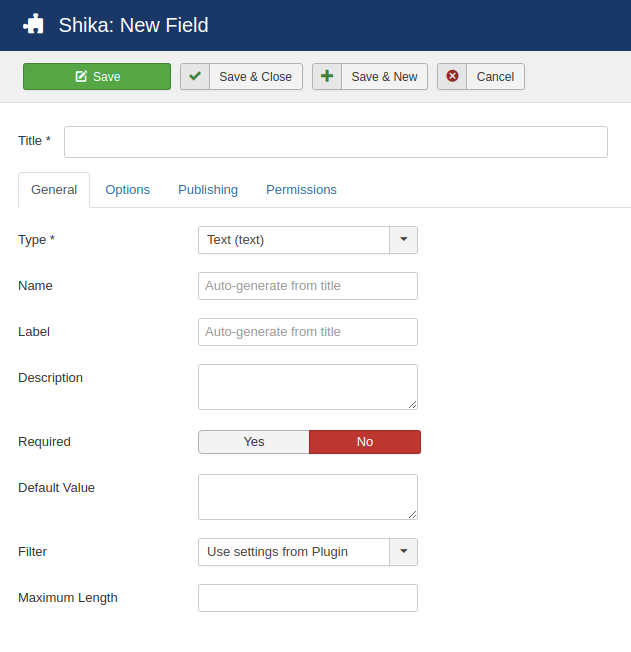
- Enter the title for the field
- Select Type for the field - e.g. radio, text, etc.
- Required - Yes/No
- Click on save and close
Lesson Categories
Here you’ll be able to create lesson categories which you may select while creating a lesson. Categories are mandatory for creating a course and it’s also important so as to segregate the similar type of content together and make it search friendly.
How to create a lesson category?
Preconditions - Shika must be installed on the instance.
- Login to admin area
- Go to Components > Shika
- On the left side menus, click on ‘Lesson Categories’
- Click on the “New” [
] button on the top left i.e from the toolbar.
- Enter category name in “Title” field, and select “Parent” if you wish to add this category under another category.
- Once this is done, click on “Save and Close” [
] to save the category.
Question Categories
Here you’ll be able to create question categories which you may select while creating a question. Categories are mandatory for creating a question and it’s also important so as to segregate the similar type of content together and make it search friendly.
How to create a question category?
Preconditions - Shika must be installed on the instance.
- Login to admin area
- Go to Components > Shika
- On the left side menus, click on ‘Question Categories’
- Click on the “New” [
- Enter category name in “Title” field, and select “Parent” if you wish to add this category under another category.
- Once this is done, click on “Save and Close” [
Question Bank
Here you’ll be able to create questions of different types and having different grading types. Here are the different action which can be done from his page -
- Create a question
- Edit/Publish/Unpublish/Trash a question
- Import CSV
Create a Question
To create a question, here are the steps -
- Login to admin area
- Go to Components > Shika
- On the left side menus, click on ‘Question Bank’
- Click on the “New” [
- A quiz form will open up. The fields available are -
- Question type
- MCQ
- MRQ
- File upload
- Subjective - Text Area
- Subject - Text Input
- Objective - Test Input
- Rating
- Grading type
- Question title
- Unique ID
- Question description
- Ideal time duration (in mins)
- Select Category
- Select Difficulty level
- Question Media
- If Question type is MCQ
- Marks
- Answer text
- Media type
- Is correct
- Marks
- Comments
- Remove
- Reorder
- Answer text
- Media type
- Is correct
- Comments
- Remove
- Reorder
- Answer text
- Media type
- Comments
- Remove
- Reorder
- And grading type selected is “Quiz”
- And grading type selected is “Exercise”
- And grading type selected is “Feedback”
- If Question type is MRQ
- Marks
- Answer text
- Media type
- Is correct
- Marks
- Comments
- Remove
- Reorder
- Answer text
- Media type
- Is correct
- Comments
- Remove
- Reorder
- Answer text
- Media type
- Comments
- Remove
- Reorder
- And grading type selected is “Quiz”
- And grading type selected is “Exercise”
- And grading type selected is “Feedback”
- If Question type is File Upload
- Question tab
- Answers tab - Based on the Grading type selected in “Question” tab fields in “Answer” tab varies.
[NOTE - File upload type question doesn’t have answers associated with it]
- If Question type is MCQ
- And grading type selected is “Quiz”
- Marks
- Answer text
- Media type
- Is correct
- Marks
- Comments
- Remove
- Reorder
- And grading type selected is “Exercise”
- Answer text
- Media type
- Is correct
- Comments
- Remove
- Reorder
- And grading type selected is “Feedback”
- Answer text
- Media type
- Comments
- Remove
- Reorder
- And grading type selected is “Quiz”
- If Question type is MRQ
- And grading type selected is “Quiz”
- Marks
- Answer text
- Media type
- Is correct
- Marks
- Comments
- Remove
- Reorder
- And grading type selected is “Exercise”
- Answer text
- Media type
- Is correct
- Comments
- Remove
- Reorder
- And grading type selected is “Feedback”
- Answer text
- Media type
- Comments
- Remove
- Reorder
- And grading type selected is “Quiz”
- If Question type is File Upload
- [NOTE - File upload type question doesn’t have answers associated with it]
- And grading type is “Quiz”
- Marks
- File Format
- File count
- Upload size in (MB)
- And grading type is “Exercise” or “Feedback”
- File Format
- File Count
- Upload size (in MB)
- If Question type is “Subjective Text Input”
- And grading type is “Quiz”
- Marks
- Answer Text
- And grading type is “Exercise”
- Answer Text
- And grading type is “Feedback
- [NOTE - Subjective questions for Feedback doesn’t have answers associated with it]
- And grading type is “Quiz”
- If question type is “Subjective Text Area”
- And grading type is “Quiz”
- Marks
- Enter Answer text
- Min length
- Max length
- And grading type is “Exercise”
- Enter Answer text
- Min length
- Max length
- And grading type is “Feedback”
- Min length
- Max length
- [Note - Subjective questions for Feedback doesn’t have answers associated with it]
- And grading type is “Quiz”
- If question type is “Objective Answer text”
- And grading type is “Quiz”
- Marks
- Enter Answer Text
- And grading type is “Exercise”
- Enter Answer Text
- And grading type is “Feedback”
- [Note - Subjective questions for Feedback doesn’t have answers associated with it]
- And grading type is “Quiz”
- If question type is “Rating”
- And grading type is “Quiz”
- Marks
- Enter lower range
- Enter Upper range
- Labels
- And grading type is “Exercise” or “Feedback”
- Enter lower range
- Enter Upper range
- Labels
- And grading type is “Quiz”
- Once you’re done adding the questions, click on “Save and Close” [
Edit/Publish/Unpublish/Trash a question
- Editing a question - A Question can be edited from the Question Bank page. To edit a question, select a question and click on “Edit” from the toolbar.
NOTE: If the question is associated with any Quiz and the quiz is already attempted even once, then some of the fields of the question(s) are non-editable.
- Publish/Unpublish a question - A Question can be published/unpublished from the Question Bank page. To publish a question, select a question and click on “Publish”/“Unpublish” from the toolbar.
NOTE: If the question is associated with any Quiz and the quiz is already attempted even once, then the question state can’t be changed.
- Trash/Delete a question - A Question can be moved to trash from the Question Bank page. To move a question to trash, select a question and click on “Trash” from the toolbar.
NOTE: If the question is associated with any Quiz and the quiz is already attempted even once, then the question state can’t be changed.
Import Questions via CSV
This option gives the ability to upload questions in bulk in Question Bank. There is a specific format in which the questions are expected to be uploaded. The sample format can be downloaded by following the steps given below -
- Click on Import CSV button on the toolbar
- A pop-up will appear and on that you’ll see two options -
- Select file for Import Quiz - A link to download the sample csv for Quiz is available on “Click here” text. The sample csv can be downloaded from by clicking on it.
- Select file for Import Exercise or Feedback - A link to download the sample csv for Exercise or Feedback is available on “Click here” text. The sample csv can be downloaded from by clicking on it.
Manage Enrolments
Here you’ll be able to Manage Assignments and Enrolments for the courses.
- To Enrol Users to a course(s), click on “New” [] button, and select course(s) and users from the list and click on “Enrol User” button.
- To Assign Users to a course(s), click on the “New” [] button, and select course(s) and users from the list, click on “Assign Course with specific dates” and select Start Date and due date, and then click on the “Assign User” button.
- To Assign a course(s) in which users are already enrolled, this can be done by setting the Start Date and Due Date and clicking on Assign Button.
Mass Importing Users
Import CSV allow multiple functions like -
- User Creation
- In case you wish only to create users from the csv, you can add the user related parameters and keep the other columns blank.
- Add user to groups
- In case of adding users to multiple groups, the groups ID’s need to be separated by “|” symbol. E.g. 2|4
- Remove user from existing groups
- In case of removing users from multiple groups, the groups ID’s need to be separated by “|” symbol. E.g. 2|4
- User Updation
- Users can be updated using any of the one parameters - User ID/User Email. In the CSV these parameter values need to be placed under the “id” column.
- User Enrollment to a course
- In case of enrolling users to multiple courses, the course ID’s need to be separated by “|” symbol. E.g. 2|4
- User De-enrollment
- In case of de-enrolling users from multiple courses, the course ID’s need to be separated by “|” symbol. E.g. 2|4
- User Assignment for a course
- Assignment start and due date to be entered in the respective row for the particular course to assign for a said date.
- Set User TimeZone
To get the sample csv, list of timezones and user groups - you can click on the highlighted links in the screenshot given below -

The following is the format to import users in bulk using the CSV import:

Certificate Templates
Manage certificate templates
Here you can create certificate templates which can be attached to a course to provide certification to the enrolled users. The certificate templates can be created using the following steps -
- Login to admin area
- Go to “Components > Shika”
- Go to “Certificate templates”
- To create a certificate template,
- Click on “New” [
- Enter “Title” for certificate
- Unique Code - is something which makes your certificate unique.
- Select a template from available templates or you can create your own certificate template using the below editor
- You can make the user certificate Private or Public .. so that depending on the user access it will be visible to the users.
- Status - if you want to make it published or unpublished.
- CSS Editor - allows you to apply styling elements css to the certificate html elements
- Once you’re done, click on “Save and Close” [
Certificate Configurations
Certificate configurations allow you to certificate level settings. Let’s check what all can be configured. The sections in configurations are -
- General
- Certificate prefix
- Certificate Random String length
- Set Certificate Privacy
- Show search box on certificate view
- Date format
- Social sharing
- Enable Social Sharing
- Select Social Sharing options
- Enable “LinkedIn” Add to profile button
- Select Organisation name or Organisation ID to pass in the URL
- Add LinkedIn organisation name or ID
- Media
- Maximum size
- Allowed Extensions
- Certificate Image
- HTML2Canvas Library
- PHP ImageMagick Library
- Certificate Image Generation type
Issued Certificates
Here you can view the list of certificates which are already issued to the users. From here, you can issue a new certificate or add an external certificate record in the LMS.

Issue a new certificate
To add an external certificate follow the steps given below -
- Login to admin area
- Go to “Extensions > Shika”
- Click on Issued Certificates
- Click on “New Training Record” button
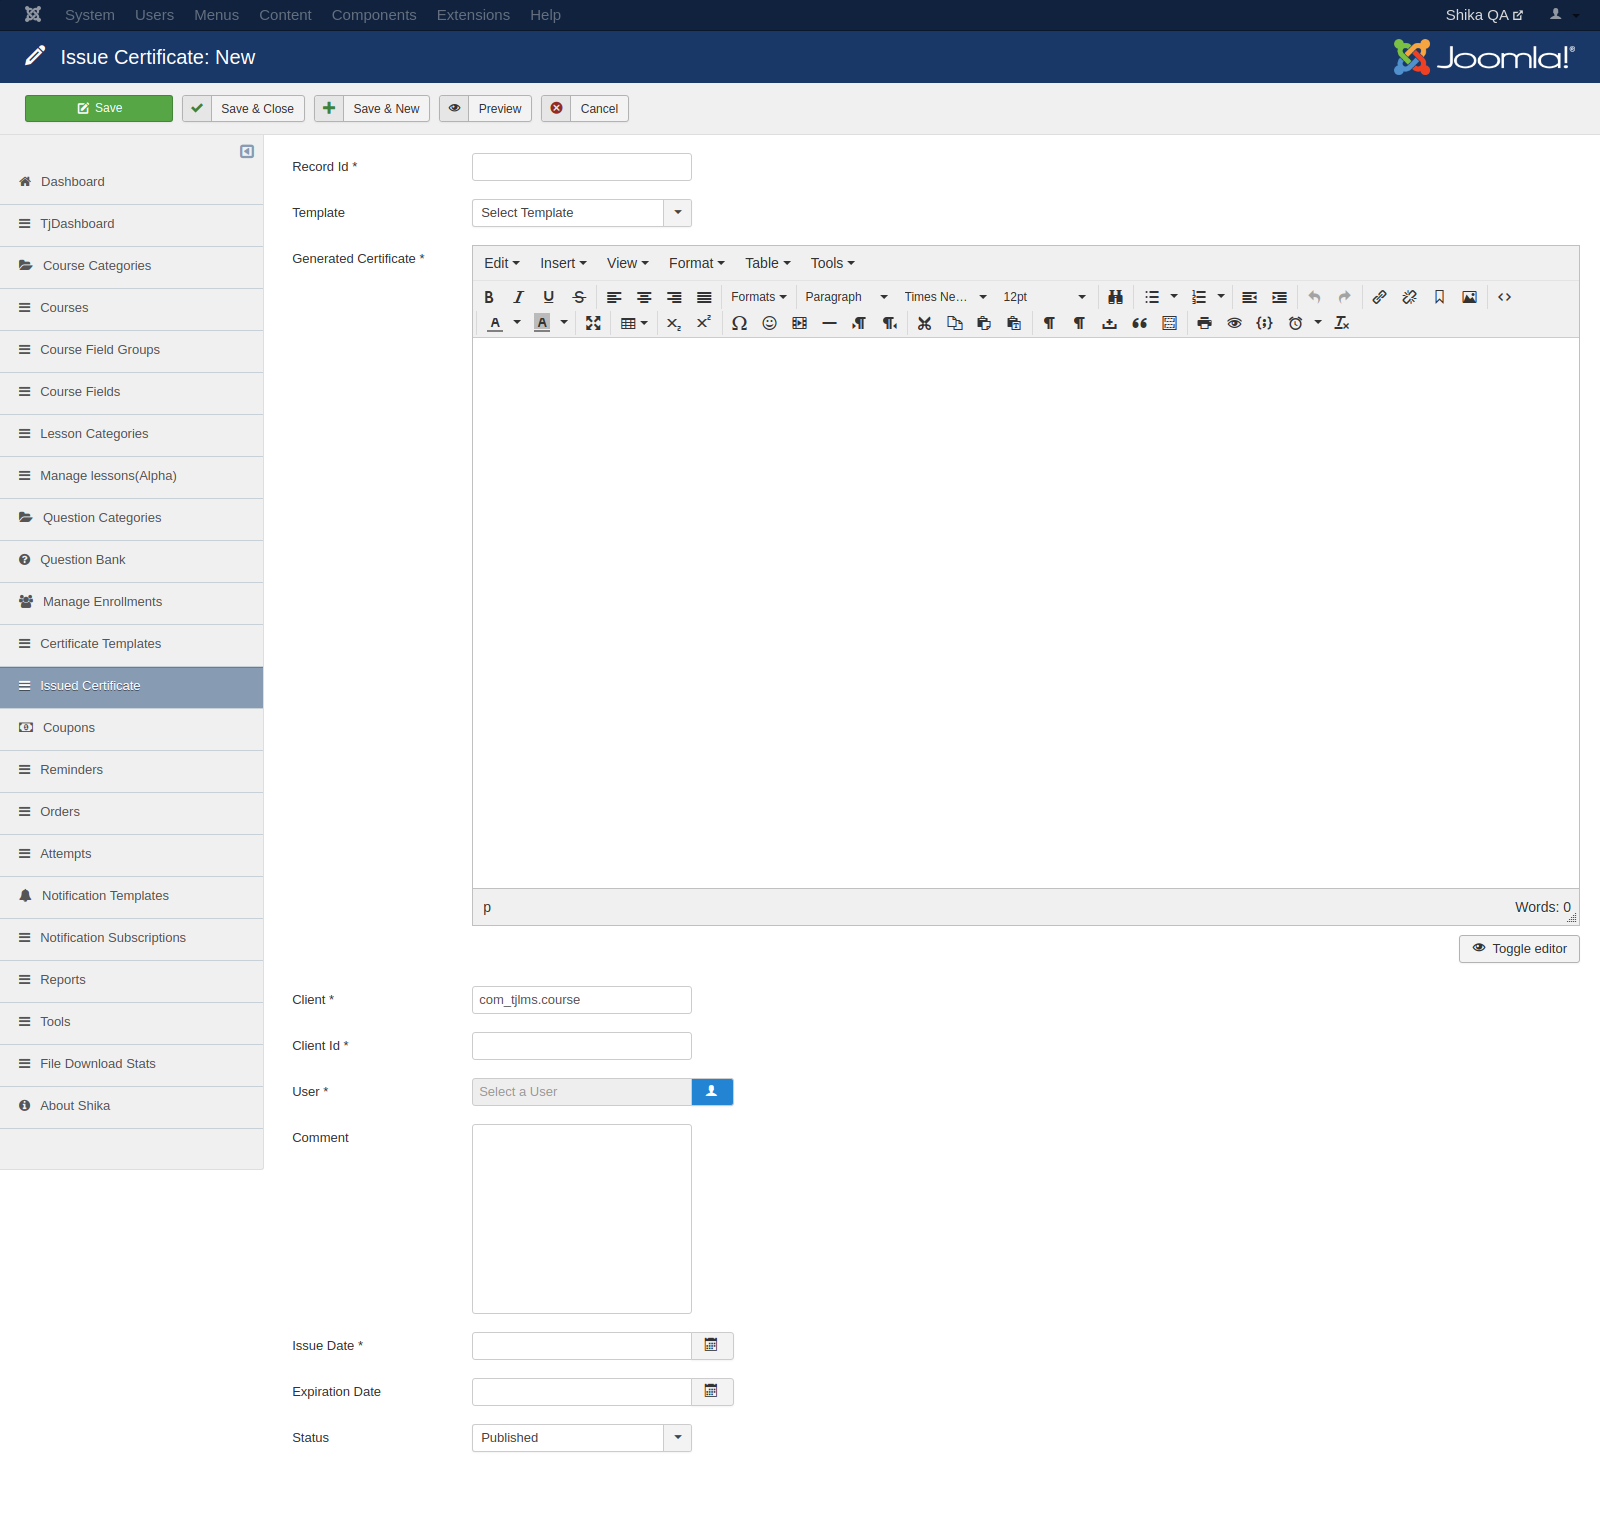
- A form will open up having the fields -
- Record Id
- Template
- Generated Certificate
- Client
- Client ID
- User
- Comment
- Issue Date
- Expiration Date
- Status
Add external certificates
To add an external certificate follow the steps given below -

- Login to admin area
- Go to “Extensions > Shika
- Click on Issued Certificates
- Click on “New Training Record” button
- A form will open up having the fields -
- User
- Name
- Record Id
- URL
- Issuing Organisation
- Issue Date
- Expiration Date
- Record Status
- Certificate file
- Status
- Comment
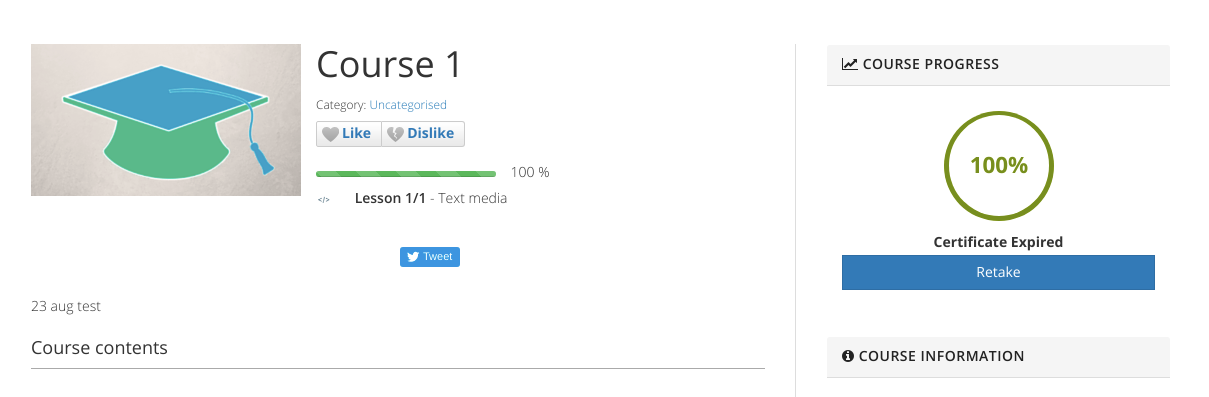
Retake the expired course
Now, you can retake the course if the certificate is expired and introduced the button for the same
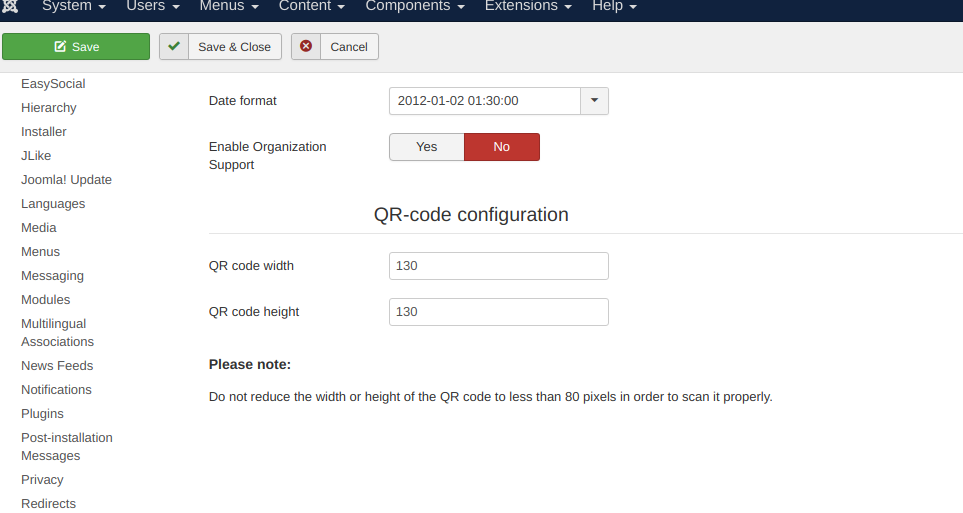
Add QR-code in Certificate
Now, we can add QR code verification to certificate
Reminders
Here you can manage reminders. Reminders are useful to notify users about their content being expired so that they will be able to complete it before it expires. Shika provides some default reminder templates.
Create a new Reminder
And in case you need to create a new reminder, here are the steps -
- Login to admin area
- Go to “Extensions > Shika”
- Click on “Reminders”
- Click on “New” [] button
- A form will open up having the fields given below -
- LMS Course
- CC
- From Email
- From Name
- Reply to Email
- Reply to name
- Title
- Content type
- Select content
- Days before
- Subject
- Email template
- In “Mail Settings” tab
- Once you are done filling the necessary fields, click on “Save and Close” [] and a reminder will be created.
- Note, that you can create a general reminder which will be applicable to all the paid courses, and for that - don’t select any content (i.e courses in “Select Content”). And in case you wish to create a reminder for a specific course or courses you can select the particular courses in the “Select Content”
Reminder options (Batch value)
In order to send the Reminder notifications, the Batch vale needs to be set. It makes sure that how many reminders should be triggered in one go when the reminder cron gets executed.
Set a Batch value
To set a batch value, here are the steps -
- Login to admin area
- Go to “Extensions > Shika”
- Click on Reminders
- Click on “Options” on the top right corner.
- On the left menus, Click on “Jlike”
- Go to “Jlike-reminders settings”
- In “Reminders Batch Size” set the value for the batching. Value here should be greater than 1, in order to make the reminder email notification work.
Attempts
Here you will be able to see a list of attempts which has been made by the users on the training materials. Here you can do following actions -
- CSV Export
- Delete
- Change the status of attempt
- Started
- Incomplete
- Completed
- Passed
- Failed
- Assessment Pending
- You can also filter the data for a particular duration. For this, click on “Search tools”, you will see some options along with Date fields. Set the “Attempt from” and “Attempt to” date to view the attempts for the set duration.
Notification Templates
Here you will be able manage the email notifications which are to be sent to the users after their actions on the LMS. You can disable the notifications from here, in case you don’t wish to send a particular notification.
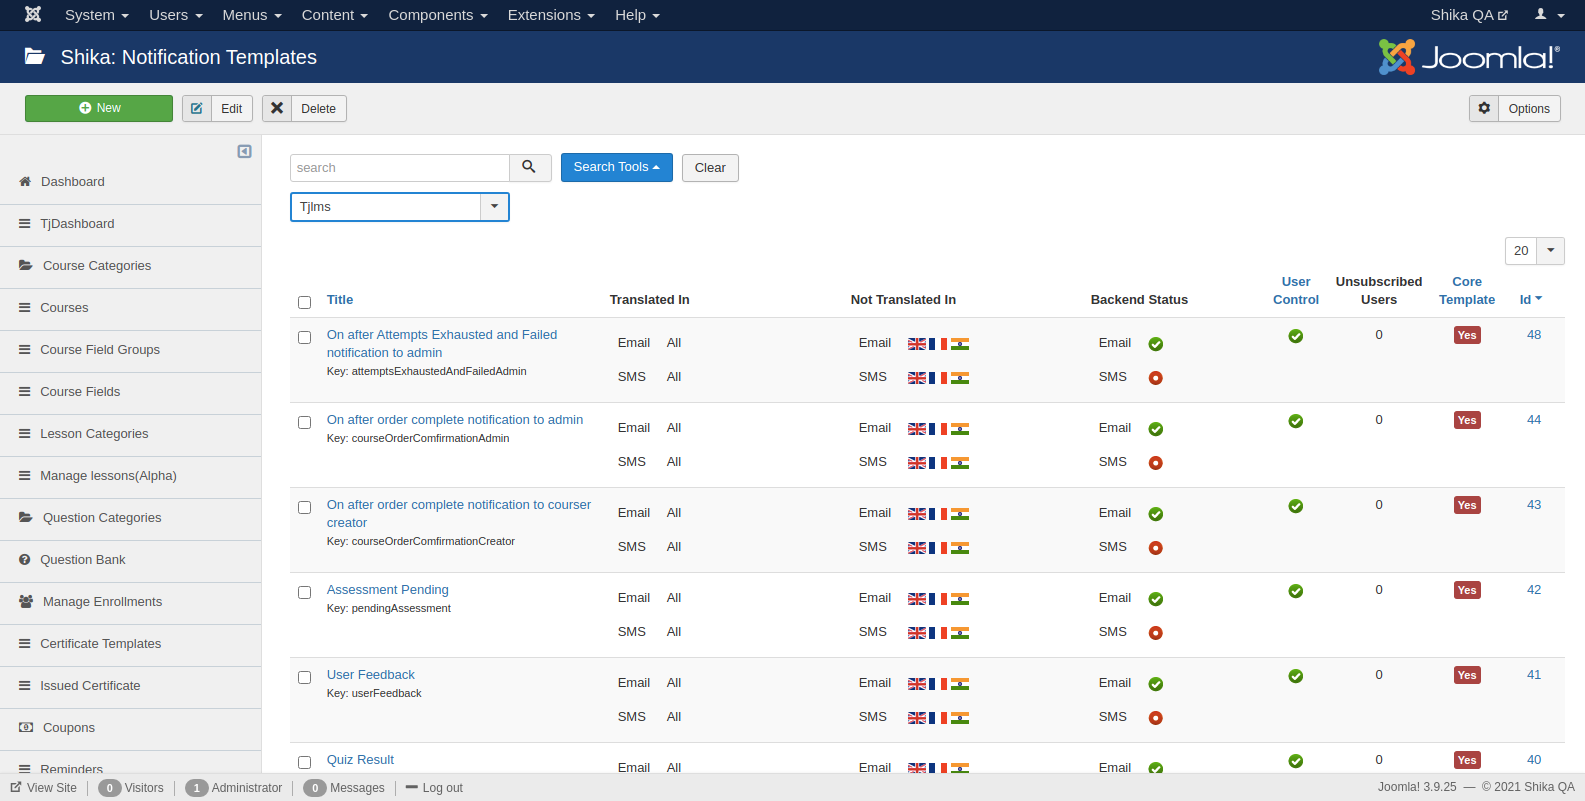
Notification Types
There are two types of notifications which can be sent, i.e Email and SMS. The templates for both the notifications can be managed from this menu.
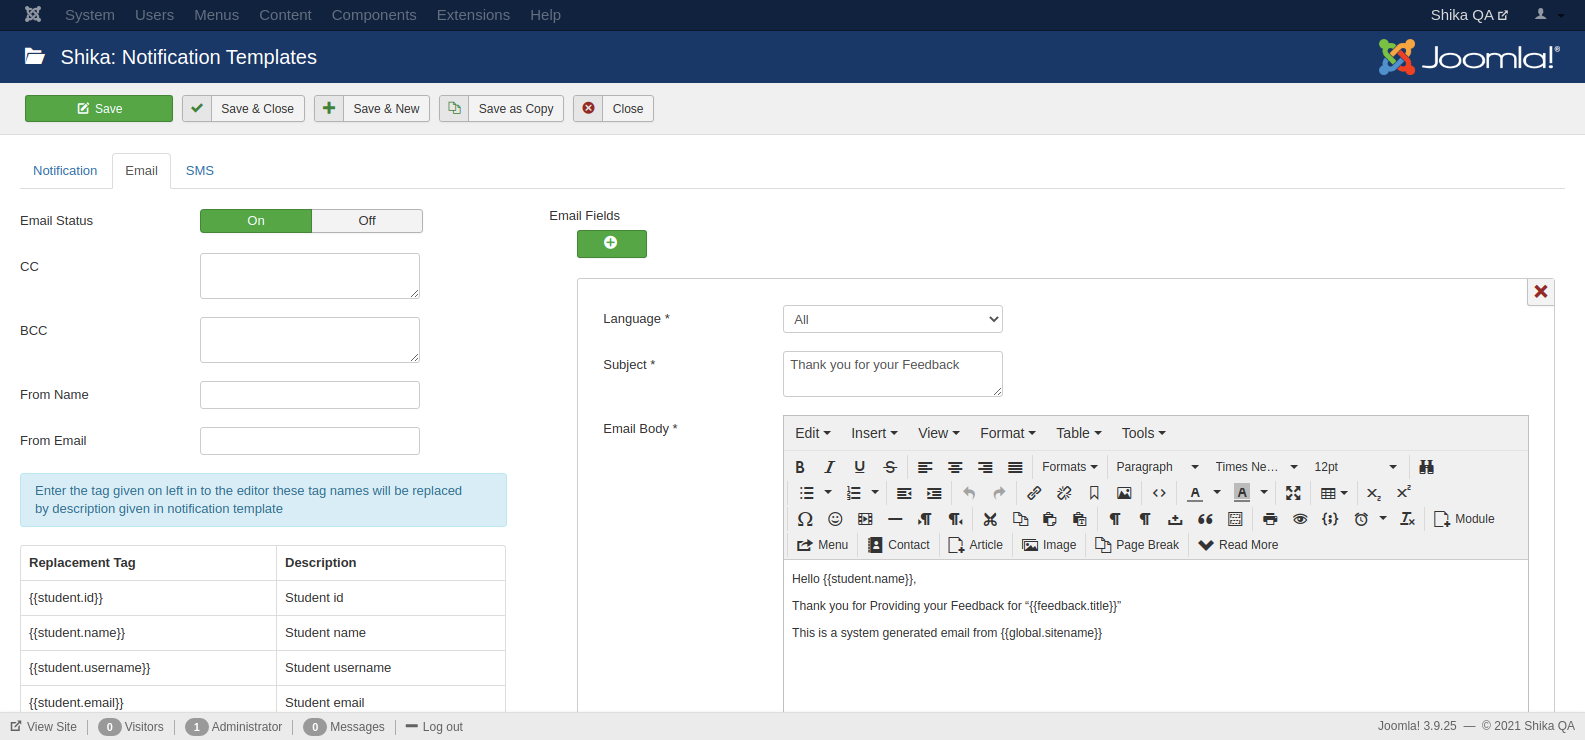
- Replacement tags can be used in Email Body for dynamic content replacement.
- Email State - If its state is ON then only SMS will get triggered.
SMS
- Replacement tags can be used in SMS Body for dynamic content replacement.
- SMS State - If its state is ON then only SMS will get triggered.
Notification Subscriptions
Here you will be able to manage the notification subscriptions.
How to create a subscription
- Login to admin side
- Go to Shika
- Click on Notification Subscription menu
- Click on “New” button to create a subscription
- Once you click on “New”, a form will appear as per the image below -
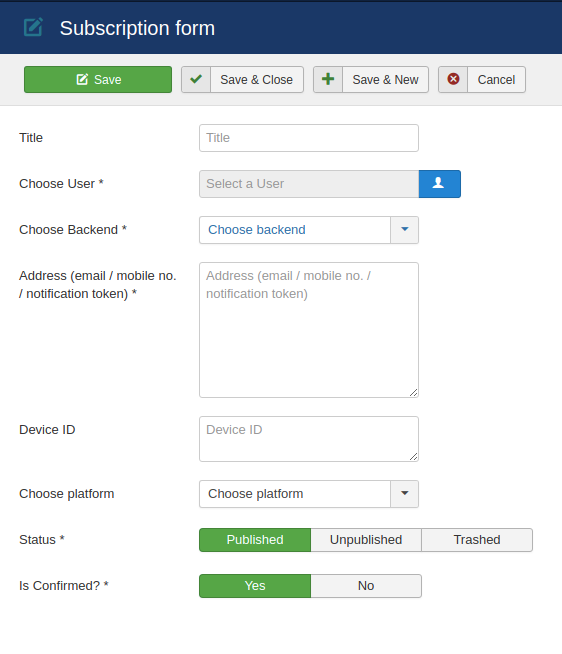
- You need to choose a user, choose a backend and enter your mobile number on which the notification will be sent.
- Choose Backend - This option you need to choose “SMS”. There are other options as well like “WhatsApp”, “Push, etc. For now we have only SMS notifications.
- For this to work, we need to have a SMS Provider plugin enabled and configured. For e.g. we have a similar plugin called “Twilio”. You can find this plugin in the “Plugins”. You need to configure the plugin to make it work.
- Account Sid
- Auth Token
- Sender Phone number
All the above details you’ll set from the twilio portal.

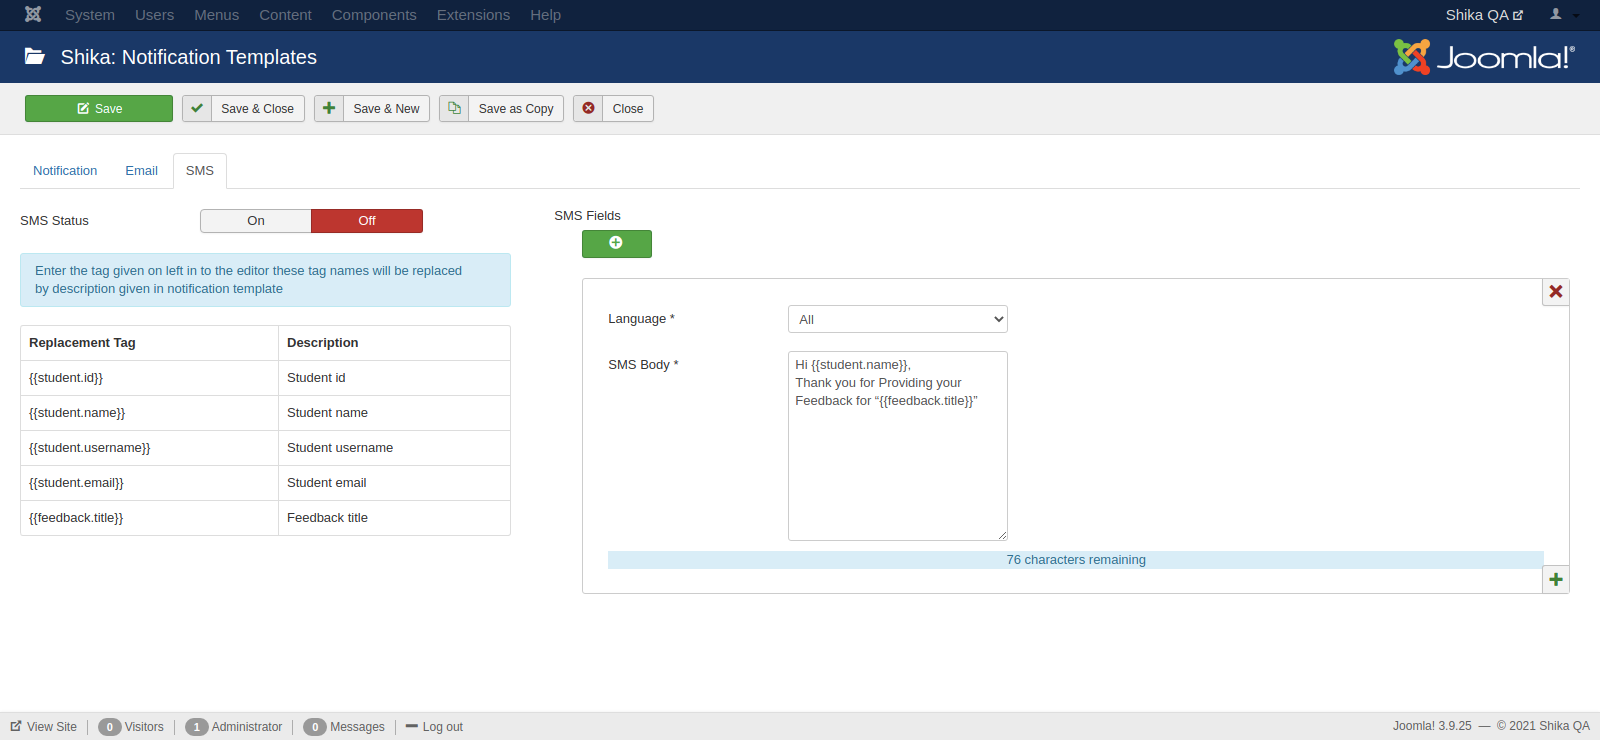
How to Enable SMS notification for any notification template
Here are the steps to enable SMS notification for “User Feedback” notification template.
- Go to Notification Templates
- Search for “User Feedback” template and edit it
- Now, click on “SMS” tab
- There is an option “SMS Status” , to enable, set this to “On”
- On the SMS body you can use the replacement tags available to have the dynamic content replaced in the sms.
- Also, you can add multiple SMS templates for different languages (if your site supports multiple languages)

Configuration for Phone number filed in Users
- Go to Notification Subscriptions and click on “Options” on the top right corner.
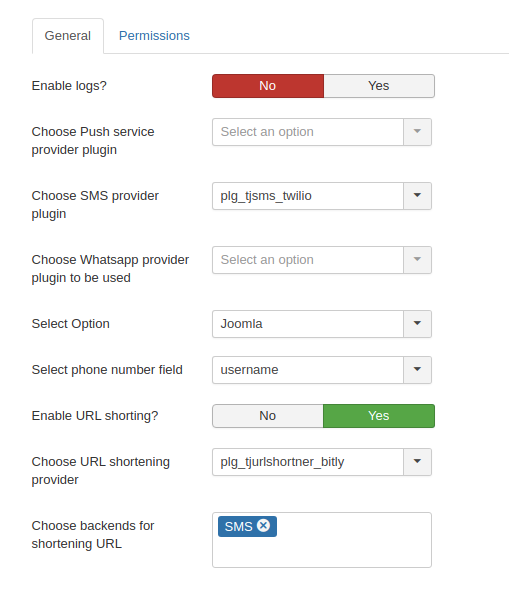
- Here you two one more plugin need to be enabled and configured to allow short links in SMS. i.e bit.ly plugin. You can find and enable this in “Plugins”.
- Here “Select Phone number filed” you can choose existing fields (i.e from Joomla) or you can create a custom user field for phone number. You need to choose a phone number filed here.
- Enable URL Shortening - This options allows short URLs in the SMS.
- Choose URL shortening provider - This option is for choosing the URL shortening provider. In this case we are using bit.ly. For this to show up here.. The respective plugin needs to be enabled in “Plugin” and configured with the necessary token ID which will be provided from bit.ly portal.
Reports
Here you will be able to get the reports based on the user activity on the LMS. These reports are available to export in CSV format and even you can create a custom report based on selected filters and save that query so that every time you will be able to see the filtered data.
There are different types of reports based on the available data. The different reports are -
- Attempt Report
- User Course Category Report
- Course Report
- Lesson Report
- Student Course Report
- Single Course Report
- Paid Course Report
- User Report
- Activity Report
- Course Category Report
- Course Grade Book Report
- Student Courses Grade Book Report
- Feedback-Exercise-Quiz Report
- SCORM Report
- SCORM summary Report
Tools
Here you will be able to recalculate the course track progress in case of some modifications in the courses. For e.g. deleting some lessons.
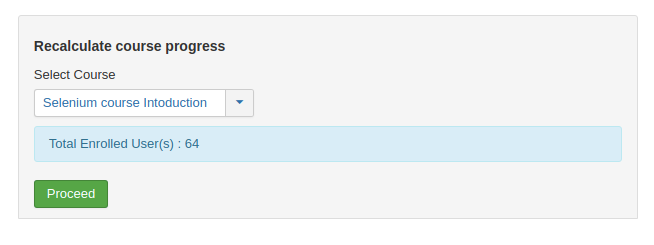
To re-calculate the course track progress, here are steps -
- Login to admin area
- Go to “Components > Shika”
- Click on “Tools”
- Select the course from the dropdown whose progress you wish to recalculate, and click on the “Proceed” button.
- Once you see a success message, the recalculation process is done.