Installation of Quick2Cart
New Installation Instructions -
- As a best practice, we recommend that you backup your site using tools like Akeeba Backup before upgrading/installing any new extension.
- Download the latest version of Quick2Cart.The downloaded file is a complete package which contains all the required modules and the plugins.
- Install the package on your site.
- Note that, by default, we only enable the commonly needed extensions. Depending on what you are using, enable the needed plugins. The Document below describes the various extensions installed as part of the Quick2Cart package.
Upgrading Instructions -
- Take a backup of any changes you have made to Quick2cart code/language files/view overrides etc.
- Download the latest version of Quick2Cart.
- Install the package on your site.
To work with different Bootstrap versions (2.x or 3.x)
Go to Quick2cart Back-end-> Options->setting Tab and read the "Setup Instruction" link which is provided for option "Working with different Bootstrap versions".
Basic Configuration after installation -
- Go to Quick2cart option-> set different option according to your requirement and save the component options.
- Also, Set different ACL permissions for the registered user from Quick2cart option->Permission tab (eg Create, Edit Own, Edit State).
- Make sure you have enabled "System - Techjoomla - Assets Loader" and set all option to YES. This minimises the Jquery conflicts.
- If you are using Zoo component to create Quick2cart products, make sure that you are using latest zoo version ( greater than 3.2.x).
- For taxation and shipping support, Enable Shipping and Taxation option from Quick2cart option-> checkout tab. And make sure that you have enabled "Taxation - Default Zone based Taxation" and "Default Zone based Shipping Provider" plugins from plugin manager. After this, you need to set up Zone, Tax rates, Tax Profiles, Shipping Methods, Shipping Profiles.
- Now, You have to add configured Tax Profile and Ship Profile against products.
Extensions in the Quick2Cart Package
Core
- The Quick2Cart core component - com_quick2cart.
- For custom Fields - com_tjfields
- Cart display module- mod_quick2cart
- Products display Module - Mod_qtcProductDisplay
- Store display module -Mod_qtcStoreDisplay
- Quick2Cart system plugin.
Integration Plugins
- Quick2Cart Zoo plugin
- Quick2Cart plugin for Joomla content - content_quick2cart
- Quick2Cart K2 Plugin - qtc_k2
Payment Plugins
- Paypal Payment Plugin -paypal
- Authorize.NET Payment Plugin - authorizenet
- PayU Payment Plugin
- Ccavenue Payment Plugin - payment_ccavenue
- Linkpoint Payment Plugin - payment_linkpoint
- Paypalpro Payment Plugin - payment_paypalpro
- JomSocial Points Payment Plugin - jomsocialpoints
- Alpha Points Payment Plugin (ver. 2.0 Onwards) - alphauserpoints
- Pay by Check Plugin (ver. 2.0 Onwards) - bycheck
- Pay by PO plugin (ver. 2.0 Onwards) - byorder
Shipping & Taxation Plugins
- Shipping Charges to Quick2Cart - qtc_shipping_default
- Taxation to Quick2Cart -qtc_tax_default
Helper / Libraries needed for Quick2Cart
- The framework on Framework (FOF)
- TechJoomla Strapper
Developer Plugins
- Quick2Cart sample development
Now that everything is installed, you can go on to configure the extension for your use. For instructions on how to Configure the extension, please refer the Configuration Document here.
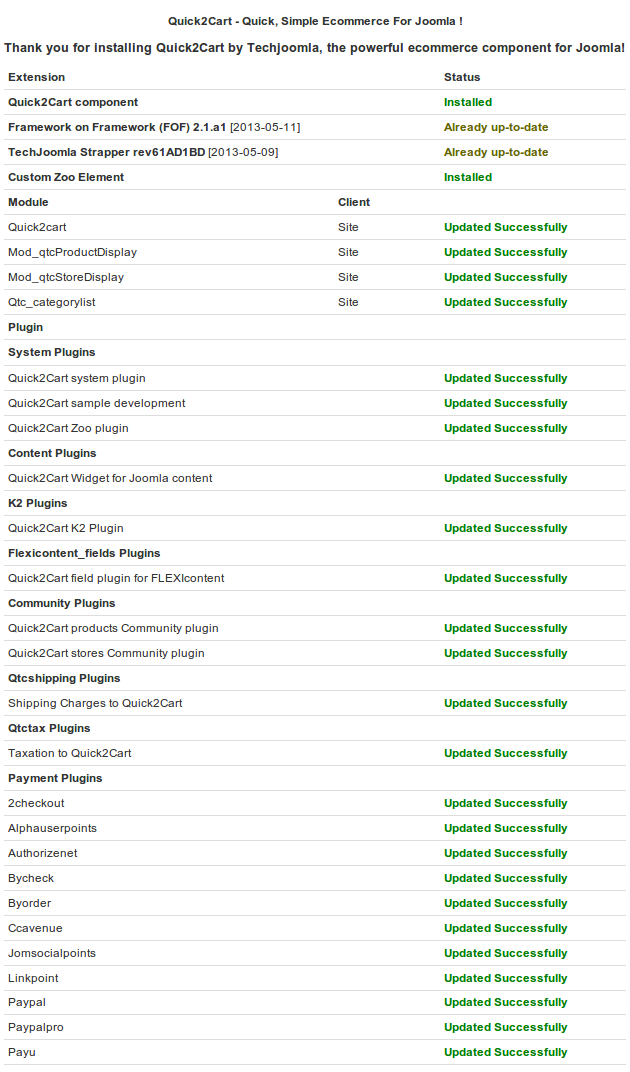
After installation, you will find extensions status as shown in below screenshot.

