Note that this part of the documentation is yet to be updated to version 2.5/2.6 of SocialAds
1. Build or Create Ad:
Users can create ads using this form. Admins will need to create a menu for this. The user is given the option to enter the site URL for the ad, the Ad title, body and image. A preview is shown as to how the ad will be displayed in the module to the other users.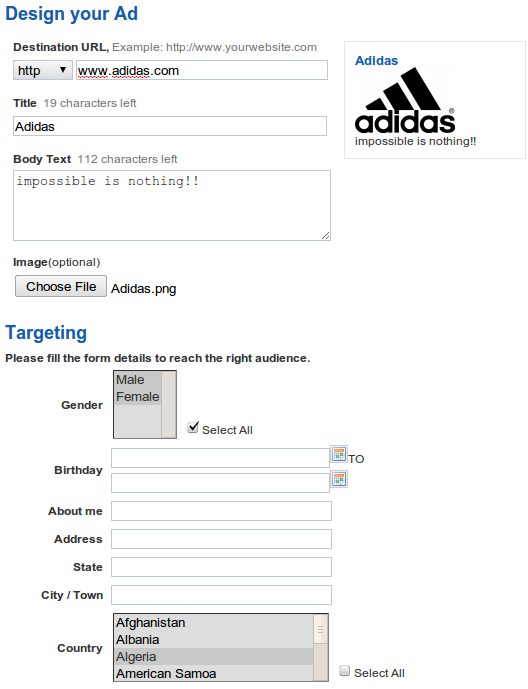
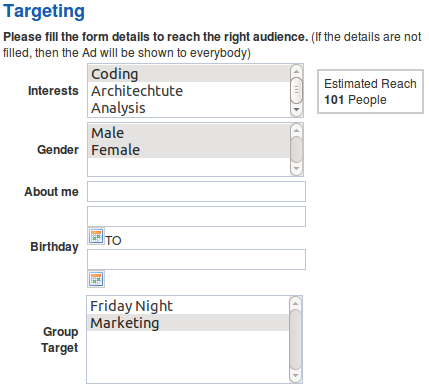
Targeting:
When you click on continue, a targetting area should be displayed. This targeting depends on how the administrator has configured the targeting options in the backend. (ver 2.6 onwards) The estimated reach count for the ad will be displayed. This will give you an estimate for how many people will be able to see your ad.
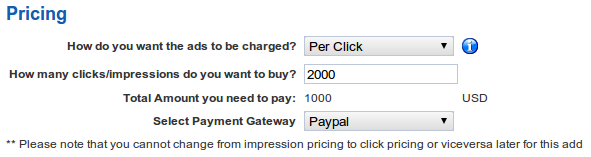
Pricing:
The Ads can be either Per Click or Per Impression. Enter the number of credits you want to buy i.e. the number of impressions or clicks. Below it, you should be able to see the amount you need to pay. Select the payment gateway and click on Review Ad.
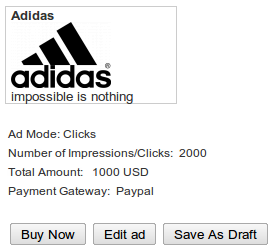
2. Review Ad:
Here you can see how your ad will be shown, and the various pricing options selected on the last page. When you click on Buy Now, it will take you to the payment gateway.
You also have the option to save the ad as draft or edit the ad.
3. Advertisement:
Once your payment is successful and the Site Admin approves your ad, your ad will be shown across all the positions where the module is published according to your ad relevance & to your targeted user group.

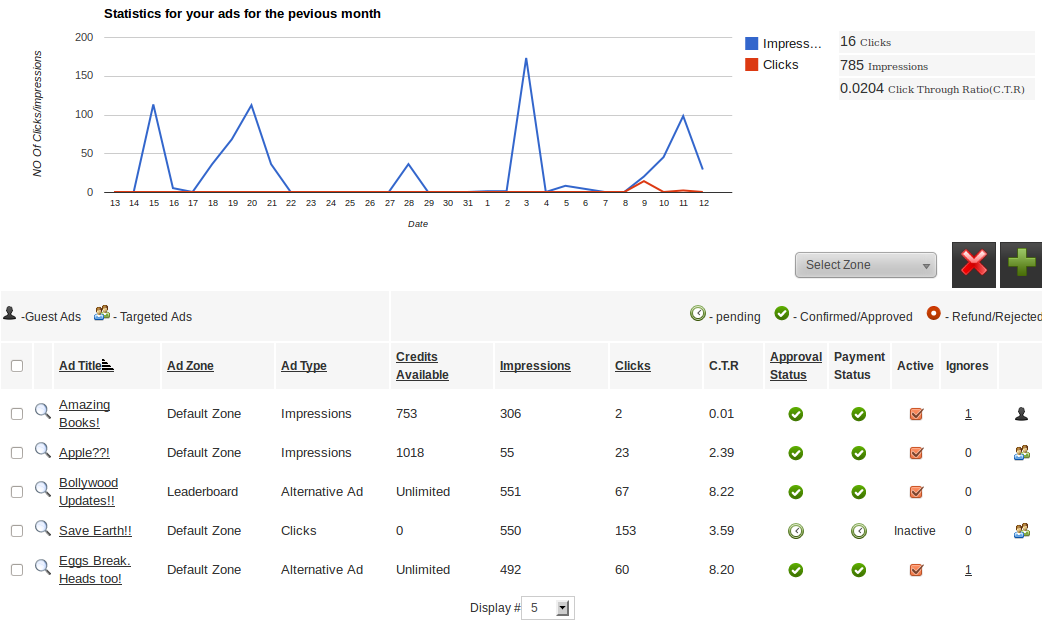
4. Manage Ad:
In this view, you should be able to see a list of all the ads that you have created and (ver 2.6 onwards) statistics in the form of line chart (interactive) for all your ads for the previous month. Additionally you can also see the overall total number of clicks and impressions and the clicks trough impression ratio (CTR)
The columns show the Ad zone, the type of Ad (Clicks/ Impressions/Unlimited/Alternate), Credits Available, Impressions Statistics, Clicks Statistics, C.T.R (Clicks Through Impressions Ratio), Active (Here you can publish/unpublish the ad), the Admin approval status, the Payment Status and the Ignores for the Ad.
(ver 2.6 onwards) There is a zone filter added, so that you can sort out the Ads for a specific zone. There are two buttons added for create ad for creating an Ad and delete ad which easily allows you to delete the selected ads.
5. Ad Summary:
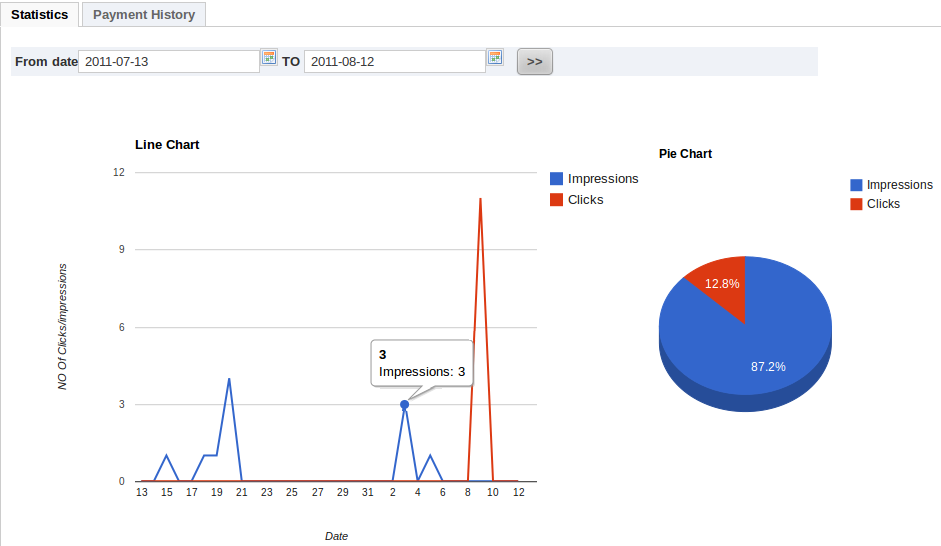
If you click on Manage on the above screen, you reach the Ad summary view where you will be shown a statistical summary of your current Ad.
You will also be provided options such as Edit Ad, Delete Ad, Buy More Credits.
For the statistics, a line chart and a pie chart are shown which shows the impressions/click statistics for the last month. (ver 2.6 onwards) There is a date filter which allows you to set the duration for the satisictis of the ad.
The payment history tab shows the various orders that you have placed against your ad.
6. Promoting Groups & Events (only for version 1.1)
You can also promote the groups & events you own in JomSocial with SocialAds..
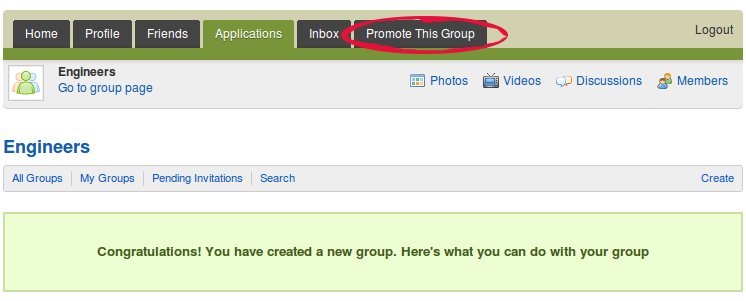
Promoting Groups.
Login as the group admin & go to the groups page.. You should see the promote this group link on the top.
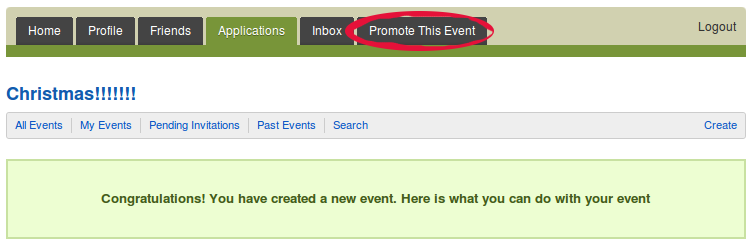
Promoting Events.
Login as the group admin & go to the groups page.. You should see the promote this event link on the top.