
A) If you are using JTIcketing 2.0. Install package directly
1) Open yoursite.com/administrator
2) Set Up Payment plugins Open Extension=>Plugin Manager=>Select Type as 'Payment'=> Now Enable and configure payment Gateways
3) Open components=>com_jticketing=>options=>Select integration as Jomsocial and save.
4) Open components=>com_jticketing=>options=>Pricing settings=>Select your payment gateway.
5) Open Menu Manager=>Your Menu Type=>Click on select=>Click on Jomsocial and create following menus.
- Create Event
- All Events
6)
- Open Menu Manager=>Your Menu Type=>Click on select=>Click on JTicketing and create following menus.
- Open Menu Manager=>Your Menu Type=>Click on select=>Click on TJVendor and create Reports menus.
Vendors Menu
- All Orders
- Attendee List
- Ticket Sales
- Reports(TJVendor Menu)
Buyers Menu:-
- Calendar
- My Orders
- My Ticket bought
7) Social integrations configuration: Set the configuration to Jomsocial to enable auto filling of billing form.
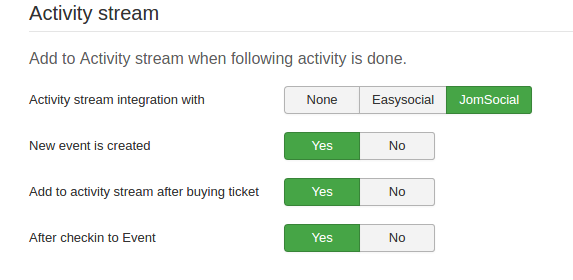
8) Activity stream configuration: Enable the activity stream integration by setting it to Jomsocial. This will trigger the activities when an event is created or when a ticket is bought or when check-in to the event is done.
9) Billing information mapping: Enter the mapping elements so as to autofill the billing information. This has to be done to map the fields.

10) Jomsocial specific settings: These settings are done so add dummy attendees to Jomsocial which will be shown in Jomsocial attendee list.
11) Publish 'JTicketing community plugin'
12) Important Note:- Publish JTicketing buy module on Event details page. For publishing module on event details pages Please refer this Firstly find module position View Module Positions and publish module in that position.
13) Now Create the future event and check once if you can buy.