Tweaking the Quick2Cart Parameters to Suit your needs
In order to configure Quick2Cart on your system go to the Quick2Cart component in the backend. Click on 'Options' button from the toolbar. Clicking on options will open a pop-up window.
Settings
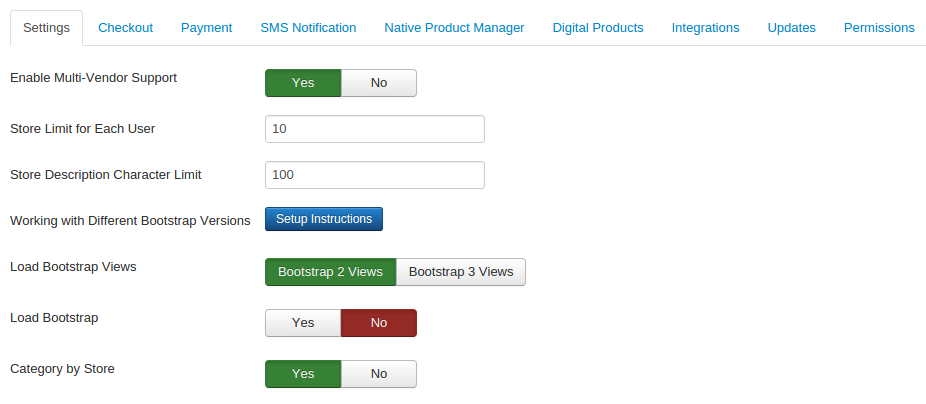
Multivendor Support
Allows any user on the site to be a vendor and set-up their own stores on your site from the frontend. The Site admin can choose to charge them a fee per transaction.
Store Limit for each User
The maximum number of stores that each user can create.
Store Description Character Limit
Limit for the character to show store description before read more link on store home page.
Working with different bootstrap versions
Click the 'Setup Instruction' link to know how to setup Quick2cart component with different Bootstrap version (2.x or 3.x)
Load Bootstrap Views
According to the selection of the option, frontend CSS, views are loaded for the component, module, plugins. Just follow the above setup instruction. If You select the Bootstrap 2 Views then you have to copy bootstrap-2 view in your templates override folder. If you select Bootstrap 3 Views then you don't have to do anything special. Just make sure that you have removed the bootstrap 2 view override if you have added
Load Bootstrap
According to current Load Bootstrap Views option, respective bootstrap.min.css CSS file (according to bootstrap version 2.x or 3.x) is loaded on your site.
Category by store
If you set to 'Yes', store categories are shown on store and product page and if you set to 'No', All categories are shown on the store page and product page"
Product Page Settings
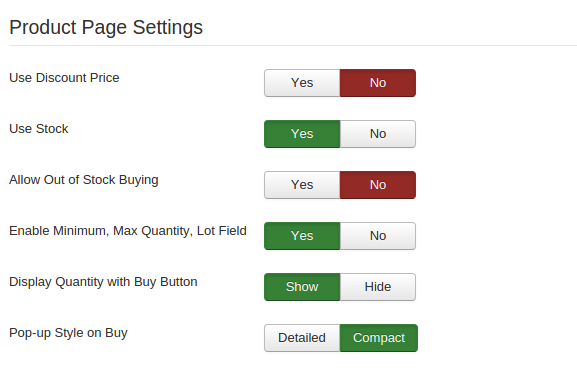
Use Discount Price
If set as 'Yes', every product will have a Discount Price in Quick2Cart options. If defined then the discount price will be considered
Price
If set to Yes will allow the vendor to provide the discount price for the product.
Use Stock
Allows to specify products stock quantities & automatically subtract quantities on successful sales.
Allow Out Of Stock Buying
Allows deciding if you want the product to be still available for sale even after if it is out of stock.
Enable Minimum & Maximum Quantity, Lot field
Ability to set minimum & maximum order quantities per product.
Display Quantity with Buy Button
Display Quantity with the buy button. If you set this option to hide option then only quantity field will be hide from product buy pages.
Pop-up style on buy
Pop-up style on buy, Compact will have just number of items in cart and buttons. Detailed will have the full cart view.
Checkout Setting
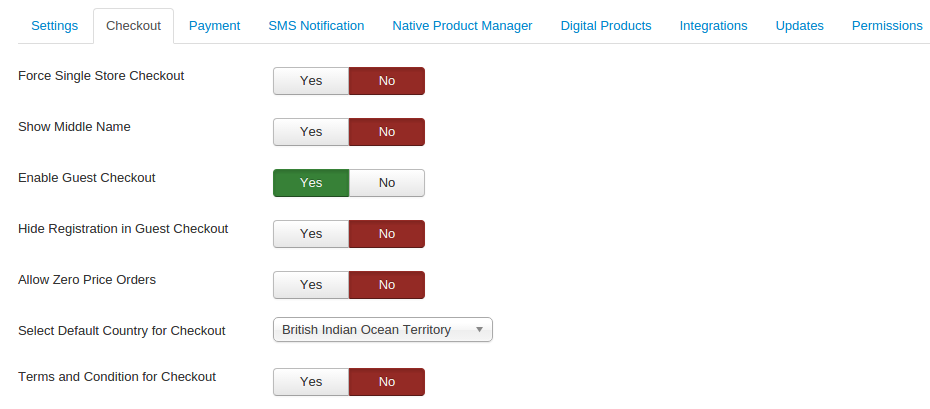
Force Single Store Checkout
If you set this to 'Yes', then buyers cannot buy products from different stores at the same time
Show Middle Name
If set to 'Yes', then the middle name field will be shown in billing and shipping views.
Enable Guest Checkout
Setting this to "Yes" will allow Guest to checkout without having to Register on the website.
Hide Registration in Guest Checkout
If the user is not logged in and you have set 'Enable Guest Checkout' to 'Yes' and 'Hide Registration in Guest Checkout' to 'Yes' then only guest checkout method will be used. It does not provide the facility for user registration.
Allow Zero Price Orders
If you set to 'Yes' then you are allowed to place orders with zero order price.
Select Default Country for Checkout
Select default country to be used on the default page.
Terms And Condition For Checkout
Setting this to Yes will show a "terms and condition" checkbox and orders will only be processed if the checkbox is checked.
Taxation and Shipping Settings
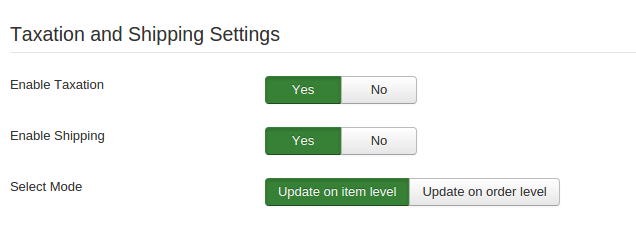
Enable Taxation
If set as Yes, tax-related fields will be displayed on add product page and taxation will be considered in the checkout process
Enable Shipping
Ability to optionally set shipping configuration. NOTE: If set as Yes, shipping related fields will be displayed on add product page, checkout page etc. eg. product's length and weight fields and shipping charges will be considered in the checkout process.
Select Mode
According to the selection, tax and shipping charges will be applied to individual item level or order level. According to the mode of selection, you have to enable the respective plugin from plugin manager.
For item-level mode you have to enable Default Zone based Shipping Provider(tjshipping) and Taxation - Default Zone based Taxation(tjtaxation) plugins.
For order level mode, you have to enable Shipping Charges to Quick2Cart(qtcshipping) Taxation to Quick2Cart(qtctax) plugins.
NOTE: For multi vendor mode do not use order level shipping and taxation
If shipping and taxation enable, then shipping and taxation calculated according to mode.
Email Notification Settings for order
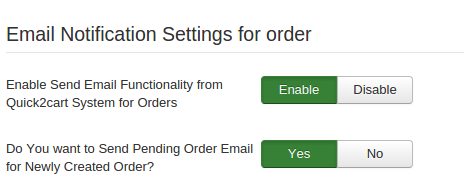
Email Notification Settings for order This configuration is used For enabling sent email functionality to the customer via Quick2cart system for orders.
1. Enable send email functionality from Quick2cart System for orders :
If you enable this option, order related emails will be sent from the Quick2cart system. This option will helpful when Third party component handling the checkout part.
For e.g, You will need this option in case of Pay With Amazon integration. "
Here the configuration for enabling send mail functionality. If you set "Enabled" then
If you set "Enabled" then the only email will send to the customer after his order status changed. And also displaying configuration for sending pending order emails for newly created order. otherwise, this configuration will be hidden.
2. Do you want to send Pending order email for newly created order?
If 'Do you want to send pending order email for newly created order' set as 'Yes' then the only email will be sent to the customer after the newly order is placed.
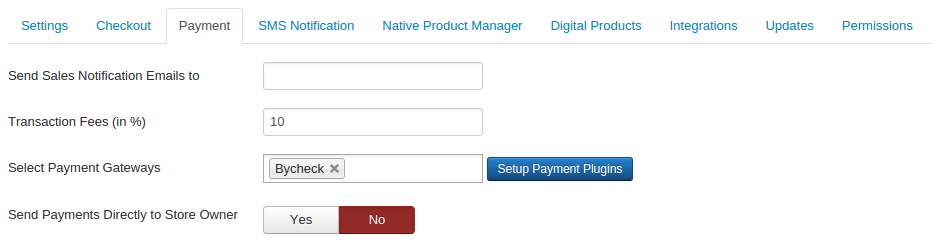
Send Sales Notification Emails to
Order emails will be sent to all email ids mentioned in Sales Email. Email should be comma separated. Note that if not filled then the site Administrator will get an order email. In addition to the emails set here, Order emails are also sent to the buyer.
Transaction Fees (in %)
Applied only when the multi-vendor mode is ON. Transaction fees will be in percentage of total amount of the Store Order Items.
Select payment gateway(s)
Select which of the available payment gateways should be used with Quick2Cart for transactions. You will need to configure the payment plugins for selected gateways as required in the Plugin configuration. Please refer the Payment Plugin documentation here.
Send Payments Directly to Store Owner
Send payments directly to store owner without charging any commissions ( Works only if you are using Paypal Payment Gateway, Single store checkout mode is enabled and the commission is set to 0 )"
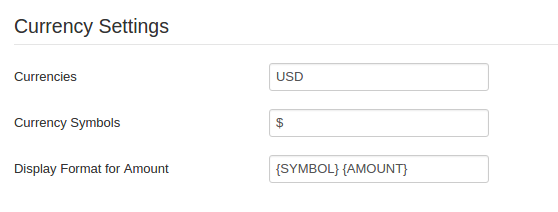
Currency
Quick2Cart has basic multi-currency support. Enabling this will allow you to specify product prices in Multiple currencies & the user can choose what currency he wishes to check out with. Add Multiple currencies using the international currency codes with comma separated in this field. The first currency will be set as default. e.g. USD,INR,EUR
Currency Symbols
Displays Currency Symbols instead of Currency code. NOTE: Enter Symbols in the same order as Codes, example if, Codes: USD, INR, EUR then Symbols: $, R, E.
Display Format for Amount
You can set currency, currency symbol display before or after amount
e.g
1.To display $ 100 use {SYMBOL} {AMOUNT}
2.To display USD 100 $ use {CURRENCY} {AMOUNT} {SYMBOL}
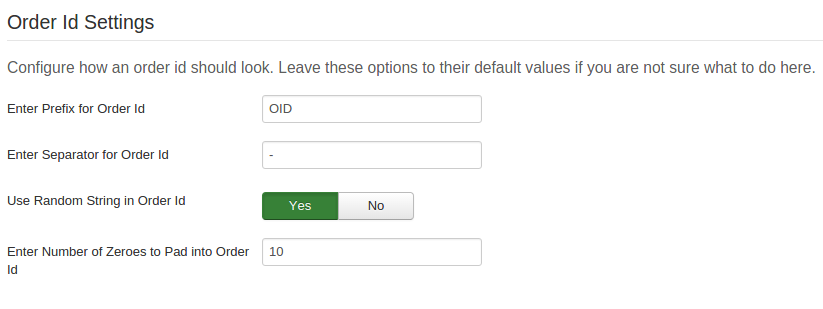
Order Id Settings
Using these settings, you can decide how you want the order id for your site to be formatted. Everything will work fine even if you leave everything as it is. But if you are using multiple extensions using Payments ( Especially if you are using Common Payment API plugins from Techjoomla) then least set a unique Prefix for the order id per extension. The rest you can change as you need.
Enter the prefix for order id
Allows setting the prefix to be used for all orders eg. 'OID'.
Enter separator to use in order id
Allows setting the separator to be used in order id generation eg. '-'.
Use random number as a part of order id
Allows using a random string of order id.
Enter the number of zeroes to be padded in order id (if required)
Allows setting the number of zeroes to be used in order id generation if needed. For example, Order id will look like OID-00022.
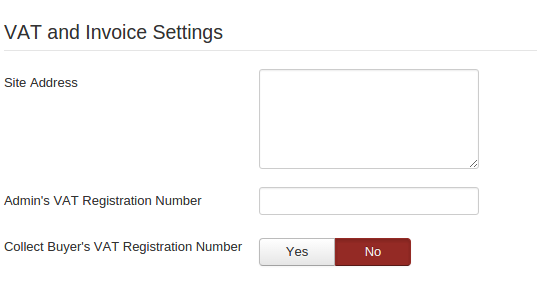
Site Address
This is site address which is used in invoice mail.
Admin's VAT Registration Number
Enter Admin's VAT Registration Number.
Collect Buyer's VAT Registration Number
Include VAT Registration Number field in Billing form.

SMS Plugin setup: Here the Configuration for SMS Plugins to send SMS Notification to the customer. After clicking on 'Setup SMS Notification' button It will redirect to SMS Group Plugins for configuration.
There are 3 SMS Plugins
For Activation of SMS NOTIFICATION Required to configure 2 plugins one is Quick2cart SMS plugin and another SMS Gateway plugin which you want to use for SMS either Sms-Horizon or Clickatell. These both are common SMS Gateway.
Quick2cart SMS :
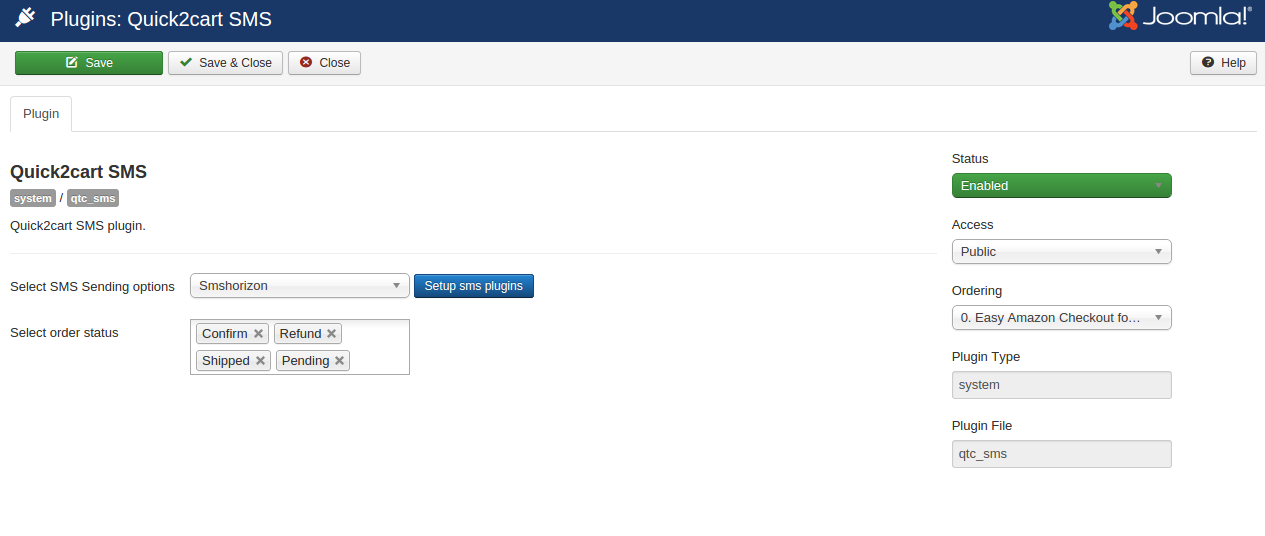
This is SMS Plugin for the Quick2cart system. This Plugin is work as like connector between the component and the SMS Gateway Plugin.
a) Select SMS Sending options: Select from the available SMS gateways.You will need to configure the SMS plugins for selected gateways as required in the Plugin configuration.
b) Select order status: Select order status for allowing to sending SMS to the customer.
Sms - Clickatell :
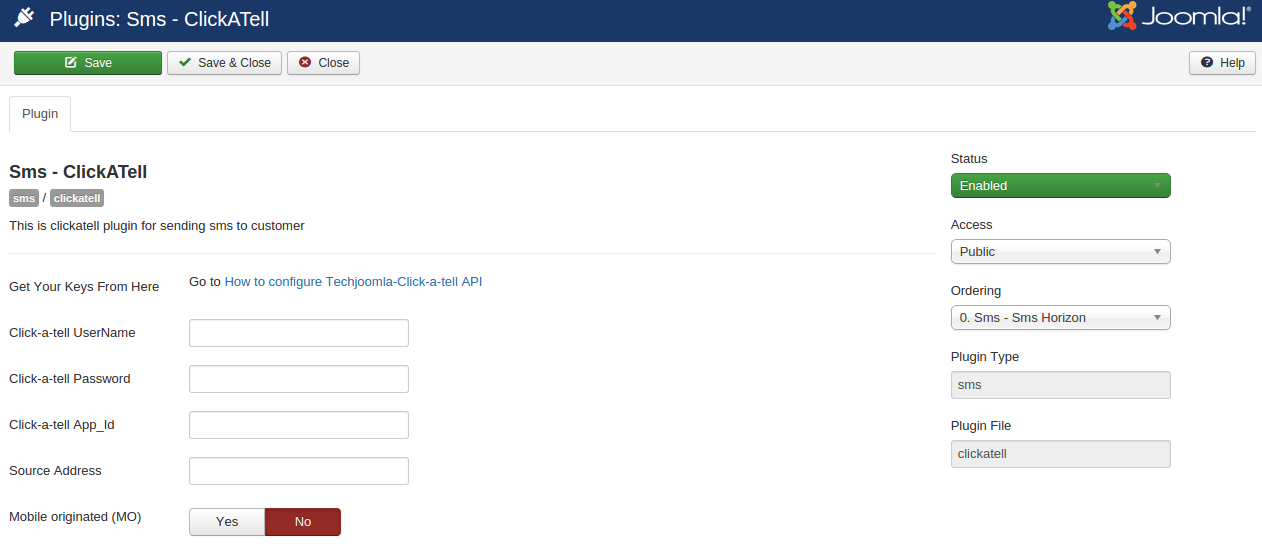
This is a Clickatell plugin for sending SMS to the customer. This is a Global SMS sends Plugin Anyone uses easily in his product. This is common SMS Gateway Plugin.
1. Get Your Keys From Here: This link gives information on How to configure Techjoomla-Click-a-tell API if the user is newly using this.
2. Click-a-tell UserName: Enter Click-a-tell UserName getting from Clickatell site after creating the account on that site.
3. Click-a-tell Password: Enter Click-a-tell Password getting from Clickatell site after creating the account on that site.
4. Click-a-tell API-ID: Enter Click-a-tell API ID getting from Clickatell site after creating the account on that site.
5. Source Address: Enter valid international format number between 1 and 16 characters long. The entered number must be registered within your online account and approved by click-a-tell before they may be used. Mobile originated numbers rented from click-a-tell do not require approval"
6. Mobile-Oriented: This parameter is only used when a message is sent to a handset and a reply is expected.<hr> PLEASE NOTE: This parameter is only valid for users who have signed up and paid for our two-way messaging service of click-a-tell.
Sms - Sms Horizon:
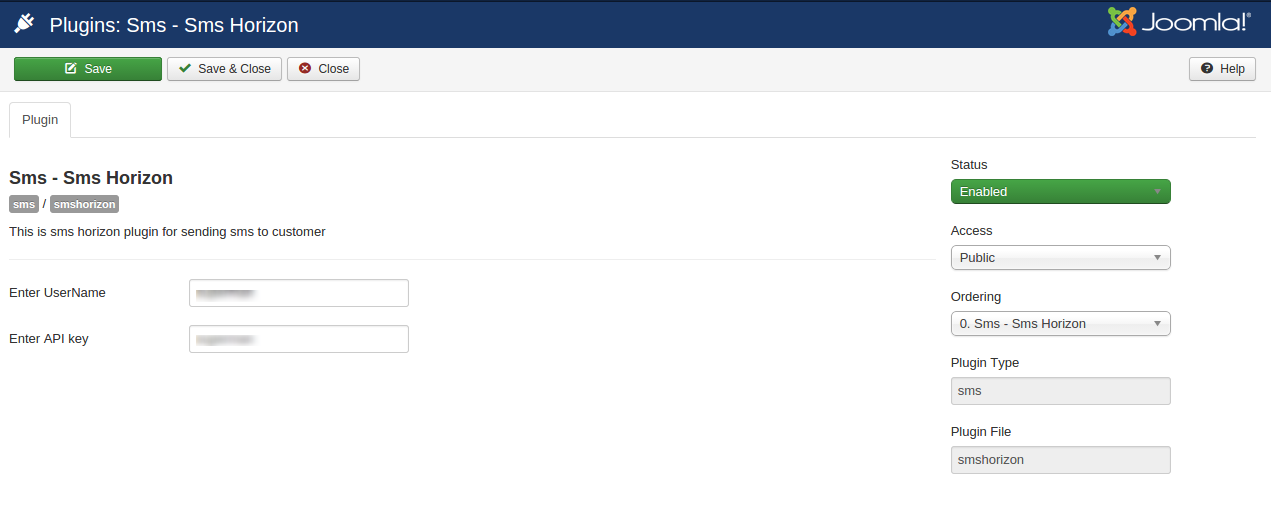
This is an SMS horizon plugin for sending SMS to the customer. This is a Global SMS sends Plugin Anyone uses easily in his product.
1. Enter User Name: Enter User Name getting from the SMS Horizon site after creating the account on that site.
2. Enter API Key: Enter API key getting from the SMS Horizon site after creating the account on that site
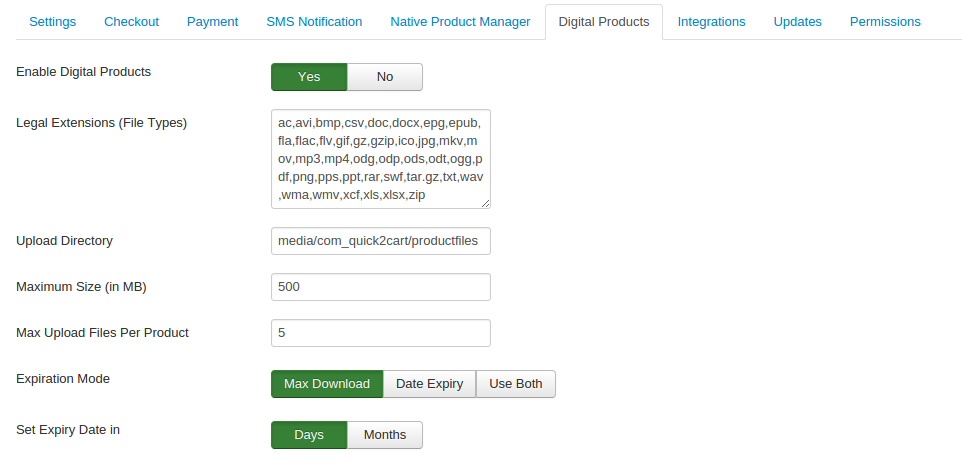
Digital Products
Enable Digital Products
Enable support for digital downloadable products.
Legal Extensions (File Types)
Extensions file types(you are allowed) to upload(comma separated).
Upload Directory
Enter the path to the files folder relative to root. e.g. media/com_quick2cart/productfiles
Maximum Size (in MB)
The maximum size for an upload (in megabytes). Note: your server has a maximum limit
Max Upload Files Per Product
Enter the maximum number of files which can be associated with each product.
Expiration Mode
Select Expiration Mode for digital downloads
Set Expiry Date in
Set Expiry Date in days or months.
Integrations
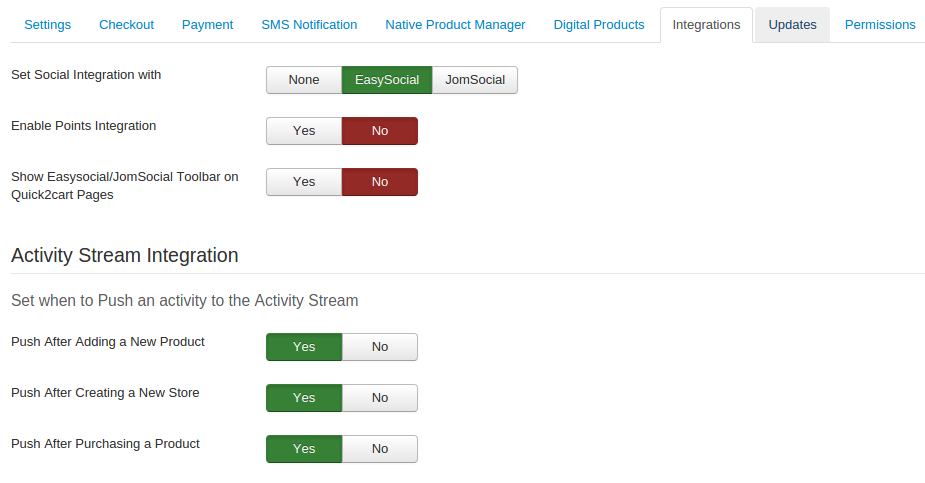
Set Social Integration with
According to set integration.You can use Quick2cart with Easy Social, JomSocial or simply with Joomla.
Enable Points, Integration
Enable points integration. As per set Social integration, corresponding points system will be used.
Show Easysocial/JomSocial Toolbar on Quick2cart Pages
According to the social integration, Easysocial/Jomsocial Toolbar will be shown on Quick2cart pages.
Activity Stream Integration
Push, After Adding a New Product
On adding a new product, activity will be pushed into the social stream according to the social integration settings.
Push, After Creating a New Store
On creating the new store, activity will be pushed into the social stream according to the social integration settings.
Push After Purchasing a Product
On creating the new store, activity will be pushed in the social stream according to the social integration settings.
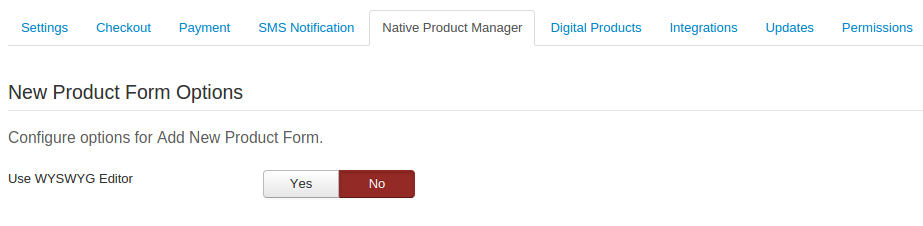
Use WYSIWYG Editor
Enables WYSIWYG Editor for Product Description field. This applies only for Native Product Manager.
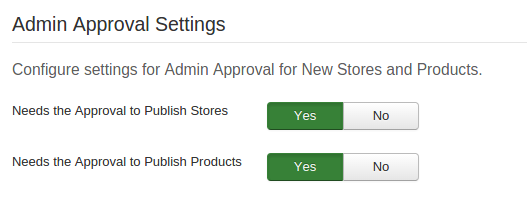
Needs the Approval to Publish Stores
When set to "Yes", admin approval is needed for publishing stores
Needs the Approval to Publish Products
When set to "Yes", admin approval is needed for publishing products.
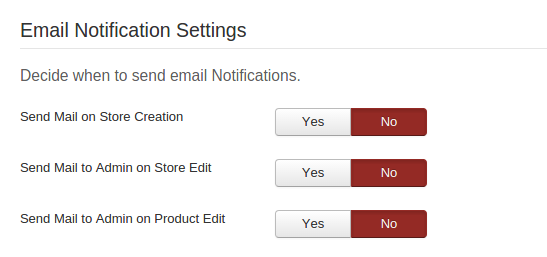
Send Mail on Store Creation
After store creation, send an email to admin and store owner.
Send Mail to Admin on Store Edit
After editing store, send an email to admin store with the short preview
Send Mail to Admin on Product Edit
After editing the product, send an email to admin store with the short preview.
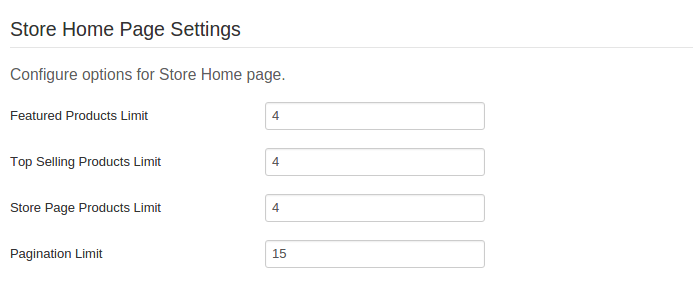
Featured Product Limit
Allows to set the number of featured products to show on store's home page which is visible to the buyer
Top Seller Product Limit
Allows to set the number of top seller's products to show on store's home page which is visible to the buyer
Store Page Products Limit
Number of products to show on store's home page along with featured and top selling products
Pagination Limit
Pagination limit for particular category products on store home page.
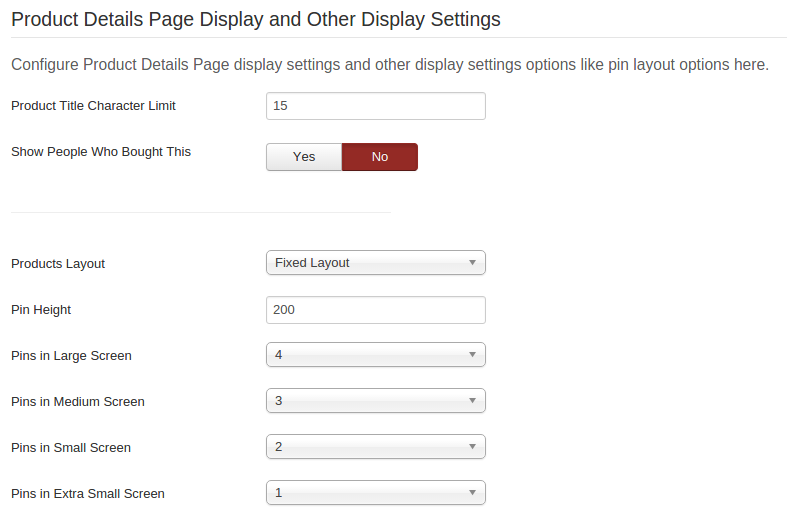
Product Title Character Limit
Product title limit to display in product teaser view (Affects Teaser Blocks, All Products Views). e.g. If you set it to 15 and 'A Little Book of Life' is your product title, then it will display as 'A Little Book o...'
Show people who bought this
If you set to 'Yes', people who bought the product being viewed will be displayed on product detail page according to social integration.
Products Layout
Select layout to show products
Pin Height
Enter height in pixels.
Pins in Large Screen
Enter pins to show on the large screen.
Pins in Medium Screen
Enter pins to show on the medium screen.
Pins in Small Screen
Enter pins to show on the small screen.
Pins in Extra Small Screen
Enter pins to show on the extra small screen.
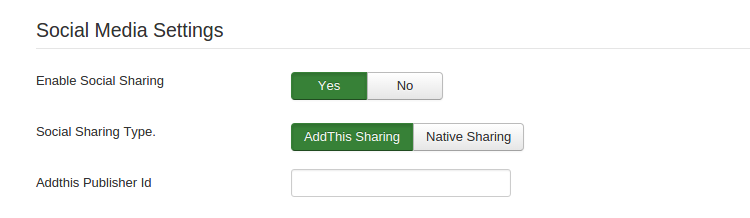
Enable Social Sharing
Enable social sharing for products
Social Sharing Type
For native sharing, there is no need to enter AddThis publisher ID
Addthis Publisher Id
Addthis publisher id - not compulsory but needed for seeing analytic at addthis.com
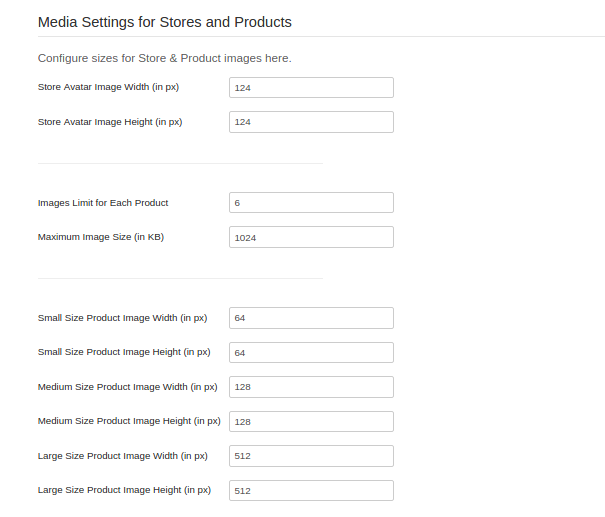
Media Settings
Store Avatar Image Width (in px)
Store Avatar Image Width in px
Store Avatar Image Height (in px)
Store Avatar Image Height in px
Images limit for each product
Allows setting the maximum number of product images to be uploaded for each product.
Maximum Image size(in KB)
Allows setting the maximum Image size in bytes.
Small Size Product Image Width (in px)
Small size product image width in px
Small Size Product Image Height (in px)
Small size product image height in px
Medium Size Product Image Width (in px)
Medium size product image width in px
Medium Size Product Image Height (in px)
Medium size product image height in px
Large Size Product Image Width (in px)
Large size product image width in px
Large Size Product Image Height (in px)
Large size product image height in px