
Setup & Configurations:
Setting up component:-
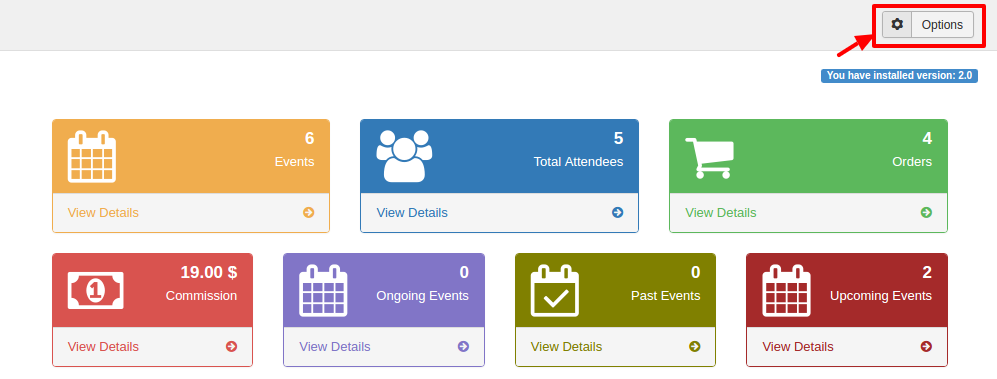
In order to configure JTicketing on your system go to JTicketing component main page on the backend. Click on 'Options' in the top right side as shown in the screenshot below.
General
Integration Setting
- Select Integration: - Select it as 'Native/JomSocial/EasySocial or JEvents'. If you select JomSocial you can sell tickets with JomSocial events. If you select EasySocial you can sell tickets with EasySocial. If you select JEvents, you can sell tickets with JEvents. If you select as Native, JTicketing itself act as event provider.
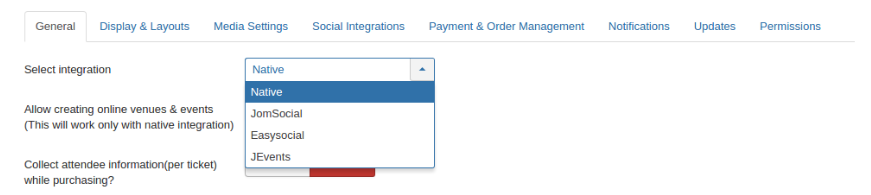
- Important Note: - Based on the selected integration you need to configure modules and menus as below,
Vendor
- - This enables automatically creation of vendor profile for a non-vendor users who is willing to create events. This will be used in the Multi-vendor system.
Guest Settings
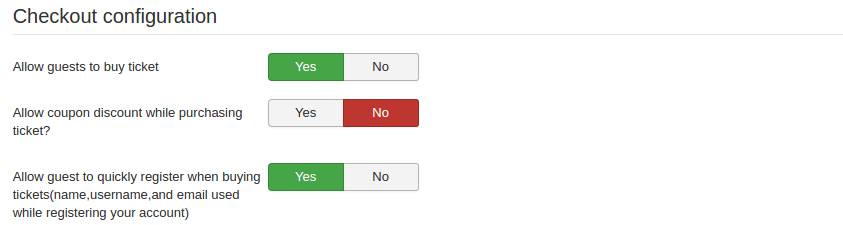
- Allow Guest to Buy ticket: - This will allows guest users to buy a ticket without login to the site.
- Allow coupon discount while purchasing tickets: - This will allow using the coupon while purchasing tickets.
- Allow Guest to quickly register when buying tickets: - This will allow guest to quickly register while buying tickets without entering extra details(name, username and email details required only).
JomSocial Specific Settings:
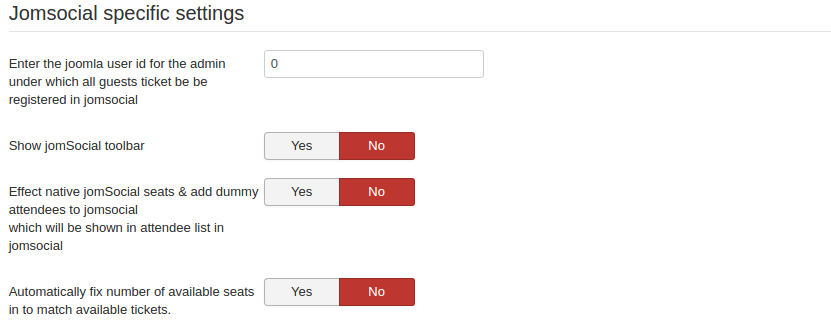
- Enter the Joomla user id for the admin under which all guests ticket to be registered in JomSocial: - Please enter the id of Joomla under which all guest will register. You will get this id from backend user manager.
- Show JomSocial Toolbar: - This will show JomSocial toolbar while buying tickets.
Effect Native JomSocial Seats & add Dummy Attendees to JomSocial which will be shown in attendee list in JomSocial: - This will add dummy entries to JomSocial attendee list under the Joomla user id above set.
Pricing Settings:
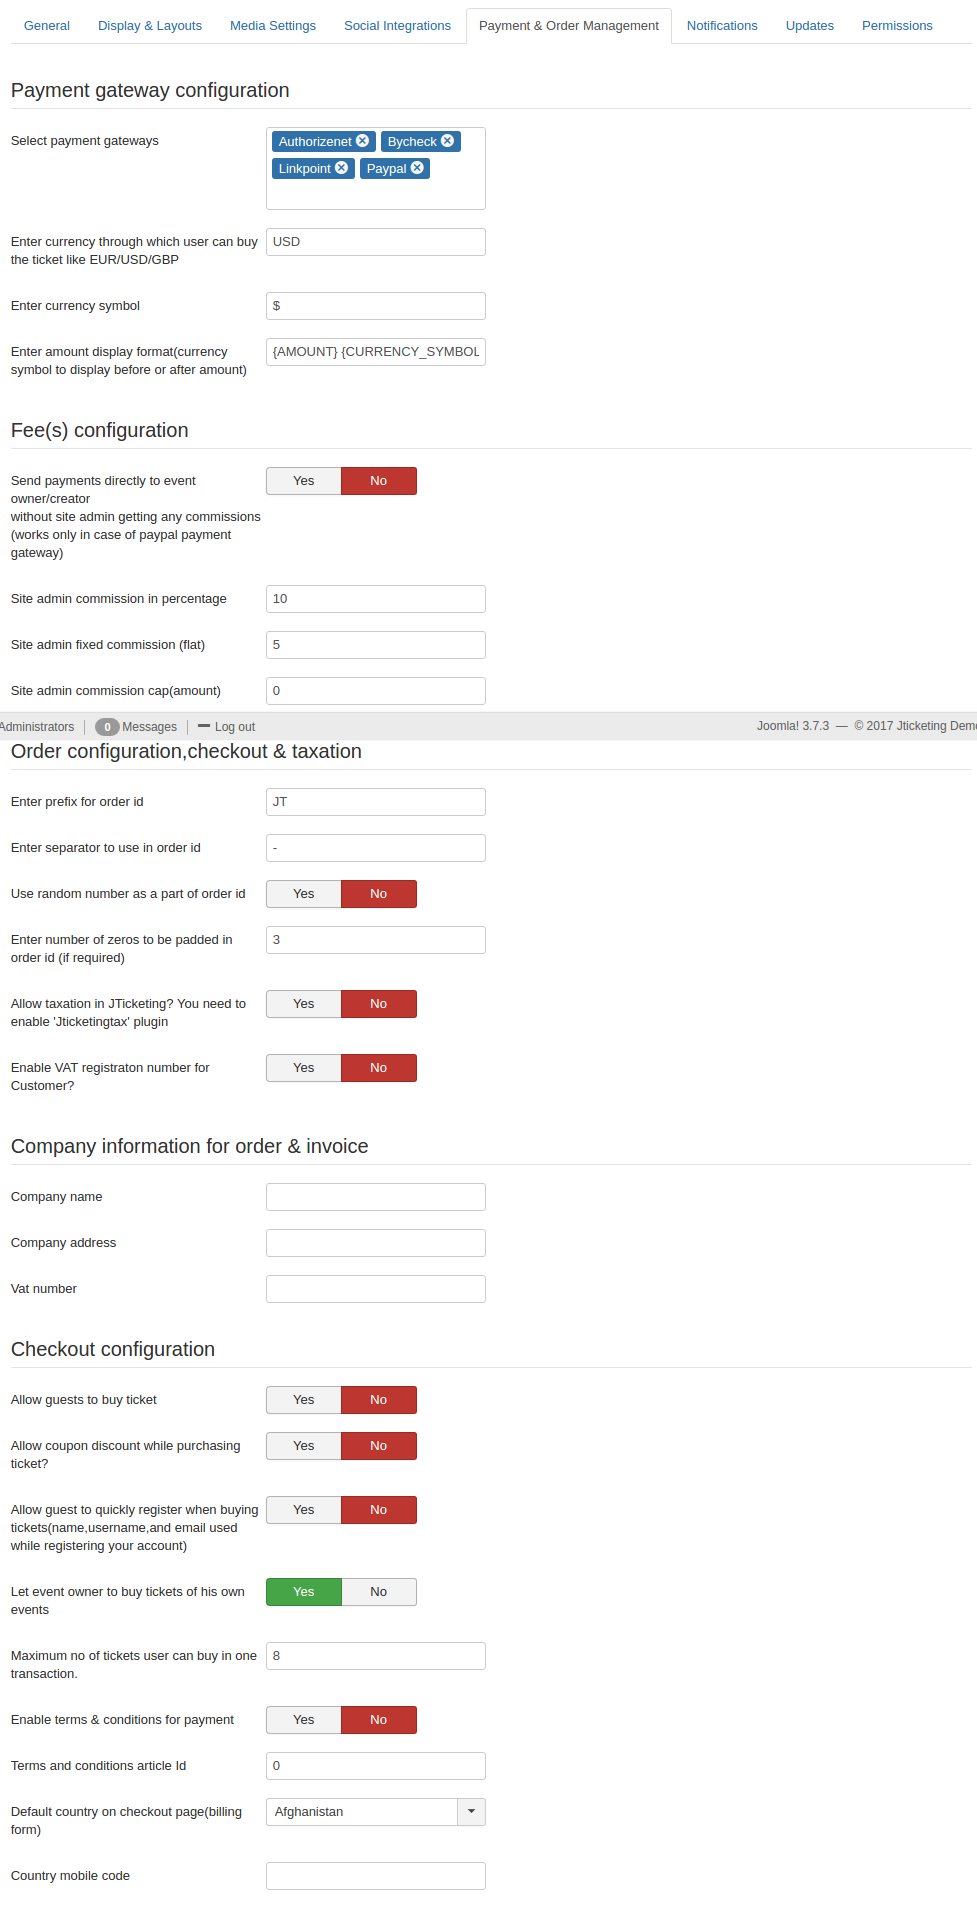
- Select Payment Gateways: -Select your payment gateways like bycheck/byorder/PayPal etc. But before this, you need to enable and configure Payment Gateways. Click here to configure payment plugins for JTicketing.
- Send payments directly to Event Owner/Creator without Site Admin getting any commissions (Works only in case of Paypal): - Send payments directly to Event Owner/Creator without Site Admin getting any commissions ( Works only in case of Paypal Payment Gateway). Works only if the commission is 0.
- Site Admin Commission in percentage: - Set to 0 if Admin does not want any percentage. Enter fixed commission fee to be charged per transaction. Commission set will be charged ONLY if above option Send payments directly to Event Owner/Creator without Site Admin getting any commissions is set to NO. e.g. Setting it to 5 means 5 percent commission will be charged on every transaction
- Site admin Fixed Commission (flat): - Enter fixed commission fee to be charged per transaction. Commission set will be charged ONLY if above option Send payments directly to Event Owner/Creator without Site Admin getting any commissions is set to NO. e.g. setting it to 5 means 5 USD(or in your currency) commission will be charged on every transaction.
- Enter currency through which user can buy the ticket like EUR/USD/GBP: - This is Currency code in which all transactions will occur
- Enable Terms & Conditions for Payment: - To show terms and conditions for payment if any.
- Terms And Conditions Article Id: - Create an article to mention terms and conditions & enter article Id in which terms and conditions are mentioned. Allow taxation in JTicketing component. You need to enable Jticketingtax plugin for this and enter tax in percentage. This will add taxation to ticket total amount.
- VAT Registration Number: - This is VAT Registration Number of Site Admin.
- VAT Registration Number for Customer: - Include VAT Registration Number in Customer Billing form.
- Default country on checkout page: - The country you have selected and configured here will be shown in the billing form while buying tickets.
- Let Event owner buy tickets of his own events: - This will allow Event owner to buy his own tickets
- Maximum No of tickets user can buy in one transaction: - Maximum No of tickets user can buy in one transaction.
Company Information for Order Invoice:
- Company Name, Company Address and Vat Number: - The configured company details will be shown on the order invoice.
Order ID Settings:
- Enter the prefix for order Id - Enter the prefix to be used for all orders (donations/investments). eg. 'JTOID'.
- Enter separator to use in order Id - Enter the separator to be used in order id generation eg. '-'.
- Use random number as a part of order id - Set if you want to use a random string of order id.
- Enter the number of zeroes to be padded in order id (if required) - Set the number of zeroes to be used in order id generation if needed. Final order id may look like this - JTOID-XYG5F-000123 Where 'JTOID' orders prefix, '-' is a separator, 'XYG5F' is a random string, '000' are zeroes padded in order id
Display and Other Settings-
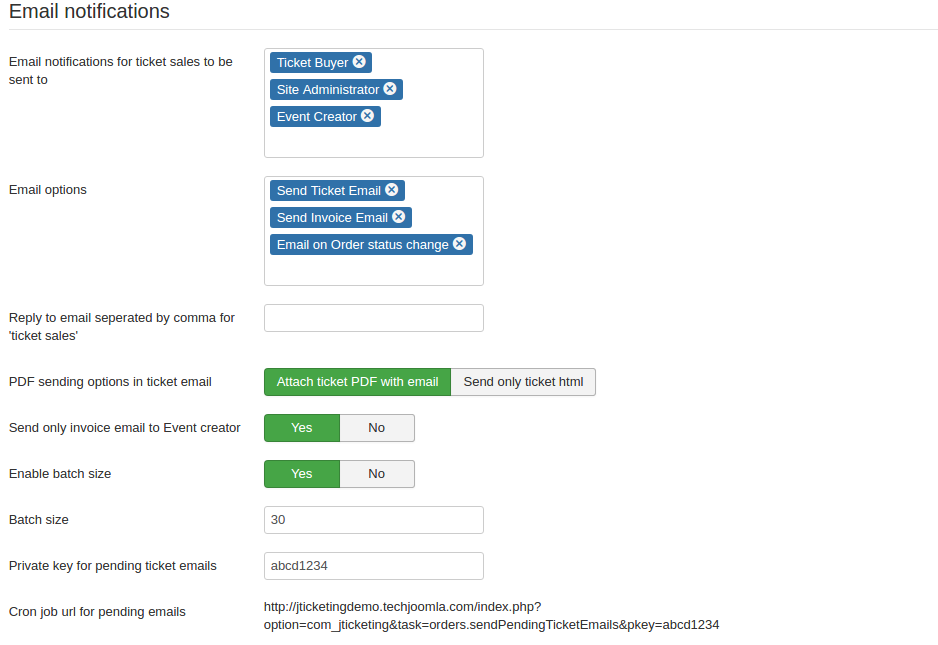
- Email Notifications for Ticket Sales to be sent to:- This Email Notifications for Ticket Sales to be sent to Ticket Buyer, Site Administrator, Event Creator. Please select Ticket Buyer, Site Administrator, Event Creator.
- Email Options: - Define which email to send e.g. Ticket Email, Invoice Email or Email on order status change.
- Reply to email separated by a comma for 'ticket sales': - This will add a reply to email for 'Ticket sales'.
- PDF sending options: Attach PDF with email or send only ticket HTML.
- Send only invoice email to Event creator: - If this option set to 'yes' then only invoice email will be sent to event creator.
------------------------------------------------------------------------------------------------------------------------------------------------------------------------------------------
Important-Setting up Modules:-
JTicketing Comes up with two modules JTicketing Buy Event Module and JTicketing Menu Module
Note: - You need to show modules only on Event Details pages and these modules will be shown only if the event is paid and tickets available and Event Start date is not passed in case of JomSocial and JEvents and For Native Integration its Booking Start Date.
A) Integration with JomSocial
- If your JomSocial version is less than 3.0: -You need to publish modules JTicketing Buy Event Module
- and JTicketing Menu Module on js_events_side_bottom.
- If your Jomsocial version is greater than equal to 3.0: - You need to publish modules
- JTicketing Buy Event Module and JTicketing Menu Module on js_side_bottom.
B) Integration With JEvents
If you are integrating with JEvents you need to publish modules depending on your template positions on Event Details Pages.
C) Integration With Native
If you are integrating with Native you need to publish modules depending on your template positions on Event Details Pages.
JTicketing Event Module(Only for Native Integration): - This module is only available if you have integration option as native in Backend JTicketing options. This module shows all events and it has many options in backend module settings.
--------------------------------------------------------------------------------------------------------------------------------------------------------------------------------------
Important-Setting up plugins:-
JTicketing comes up with following Plugins
- API - JTicketing plugin: - Please enable this plugin.
- JTicketing Joomla3.0 plugin: - Please enable this plugin.
- Payment Plugins: - You must enable and configure any one of following payment plugins(type is payment)
- 2checkout ( 2checkout - Payment plugin)
- alphauserpoints ( alphauserpoints - Payment plugin)
- authorizenet ( authorizenet - Payment plugin)
- bycheck ( bycheck - Payment plugin)
- byorder ( byorder - Payment plugin)
- ccavenue ( ccavenue - Payment plugin)
- jomsocialpoints ( jomsocialpoint - Payments plugin)
- linkpoint ( linkpoint - Payment plugin)
- paypal ( paypal - Payment plugin)
- paypalpro ( paypalpro - Payment plugin)
- payu ( payu - Payment plugin)
To configure payment plugin please click here.
A) Integration with JomSocial
Enable JTicketing - Community plugin.
B) Integration with JEvents
Enable JTicketing - JEvents plugin.
-----------------------------------------------------------------------------------------------------------------------------------------------------------------------------------
Important-Creating Menus(Important):-
A) Integration with Jomsocial:-
1) Create Event Menu:- Click on Backend => Menu Manager => Main-menu (or Your menu type) => Click on Community => Click on Create Event.
2) All Events:- Click on Backend => Menu Manager => Main-menu (or Your menu type) => Click on Community => Click on All Events.
3) My Events:- Click on backend=> Menu Manager => Main-menu (or Your menu type) => Click on Community => Click on My Events.
B) Integration with JEvents:-
1) Create JEvents Menu: - Click on Backend => Menu Manager => Main-menu (or Your menu type) => Click on JEvents => Click on Create JEvents.
2) Manage JEvents Menu:- Click on Backend => Menu Manager => Main-menu(or Your menu type) => Click on JEvents => Click on Manage JEvents.
C) Integration with Native:-
1) Create Events: - Click on Backend => Menu Manager => Main-menu (or Your menu type) => Click on JTicketing => Click on Create new event(only for Native Integration).
2) Show All Events: - Click on Backend => Menu Manager => Main-menu (or Your menu type) => Click on JTicketing => Click on All events(only for Native Integration )
3) Show My Events: - Click on Backend => Menu Manager => Main-menu (or Your menu type) => Click on JTicketing => Click on My events(only for Native Integration)
For All other menus like Sales, All orders, My orders, My tickets you can create menus of JTicketing.
Where to Change language files?
yourjoomla/administrator/language/en-GB/en-GB.plg_community_addfields.ini
yourjoomla/administrator/language/en-GB/en-GB.en-GB.com_jticketing.ini
yourjoomla/language/en-GB/en-GB.en-GB.com_jticketing.ini
yourjoomla/language/en-GB/en-GB.mod_jticketing_buy.ini
yourjoomla/language/en-GB/en-GB.mod_jticketing_menu.ini
For Payment plugins on confirmation page.
yourjoomla/administrator/language/en-GB/en-GB.plg_payment_bycheck.ini
yourjoomla/administrator/language/en-GB/en-GB.plg_payment_byorder.ini
yourjoomla/administrator/language/en-GB/en-GB.plg_payment_2checkout.ini
yourjoomla/administrator/language/en-GB/en-GB.plg_payment_alphauserpoints.ini
yourjoomla/administrator/language/en-GB/en-GB.plg_payment_authorizenet.ini
yourjoomla/administrator/language/en-GB/en-GB.plg_payment_ccavenue.ini
yourjoomla/administrator/language/en-GB/en-GB.plg_payment_jomsocialpoints.ini
yourjoomla/administrator/language/en-GB/en-GB.plg_payment_linkpoint.ini
yourjoomla/administrator/language/en-GB/en-GB.plg_payment_paypal.ini
yourjoomla/administrator/language/en-GB/en-GB.plg_payment_paypalpro.ini
yourjoomla/administrator/language/en-GB/en-GB.plg_payment_payu.ini